07-12-2019 - Technology
X-OCN and S-Log3 on Sony VENICE
By: Alister Chapman
The primary ways of recording on a Sony VENICE camera use either Sony’s S-Log3 gamma curve or 16 bit X-OCN. These are very different recording formats with pros and cons to each.

X-OCN uses 16 bit linear data and clever algorithms to record as much of the sensor’s output as possible, as close to how it comes off the sensor, but with a reduced file size. Because the data is 16 bit there is no need to use a gamma curve to reduce the highlight data or to artificially reduce the number of tonal values that are recorded. The X-OCN recordings are linear; light in the real world is linear. By recording the light from a scene using linear we are able to preserve a tremendous range of textures from the deepest shadows to the brightest highlights. Nothing needs to be reduced in range. This type of recording is often referred to as “scene referred” as our material contains an accurate record of the light levels in the scene and has not been modified in any way for display purposes.
To make our X-OCN recording watchable we have to process the recorded data to convert it into something that is compatible with our display device. This normally involves first converting the 16 bit linear sensor data into a color image, then adding a gamma curve plus any stylized or creative look.
In most post production workflows, when you view X-OCN content, it will, by default first be converted to S-Log3/SGamut3.cine. Using S-Log3 as an intermediate gamma allows the full dynamic range of the recording to be preserved and makes it easy to apply LUTs or grading processes designed for S-Log3-originated material. One notable exception to this would be if you use the Academy’s ACES workflow. In ACES, X-OCN remains in its 16 bit linear state and all the output processing is done as part of the ACES output transforms. There is no need to use an S-Log3 intermediate as ACES does all the image transforms itself.

So what is S-Log3?
S-Log3 is a gamma curve that allows a very large dynamic range to be stored within a 10 bit or other more restricted recording bit depth. It is based on the Cineon log gamma curve that was developed in the 1980s for the transfer of film to a digital intermediate. It can record a large dynamic range in a smaller file by taking advantage of the way human vision works. Our own visual system is less able to discern textures and fine details in highlights than in the mid range and shadows. So, you can allocate relatively less data to the highlights and in most cases the audience will never notice. This is particularly true for standard dynamic range productions where the monitor, TV or theatre projection itself has a restricted dynamic range, much less than the real world so generally, highlights are shown in a reduced or compressed fashion to make them fit into the limited display range without sacrificing the more important mid range.
Below middle grey, S-Log3 records each successively darker stop with less and less data. In effect the shadows are somewhat “rolled off”, but then this is not dissimilar to the way the light in the real world behaves. However above middle grey things are very different (when shooting with S-Log3 a middle grey target such as an X-Rite grey card is normally exposed at 41%).
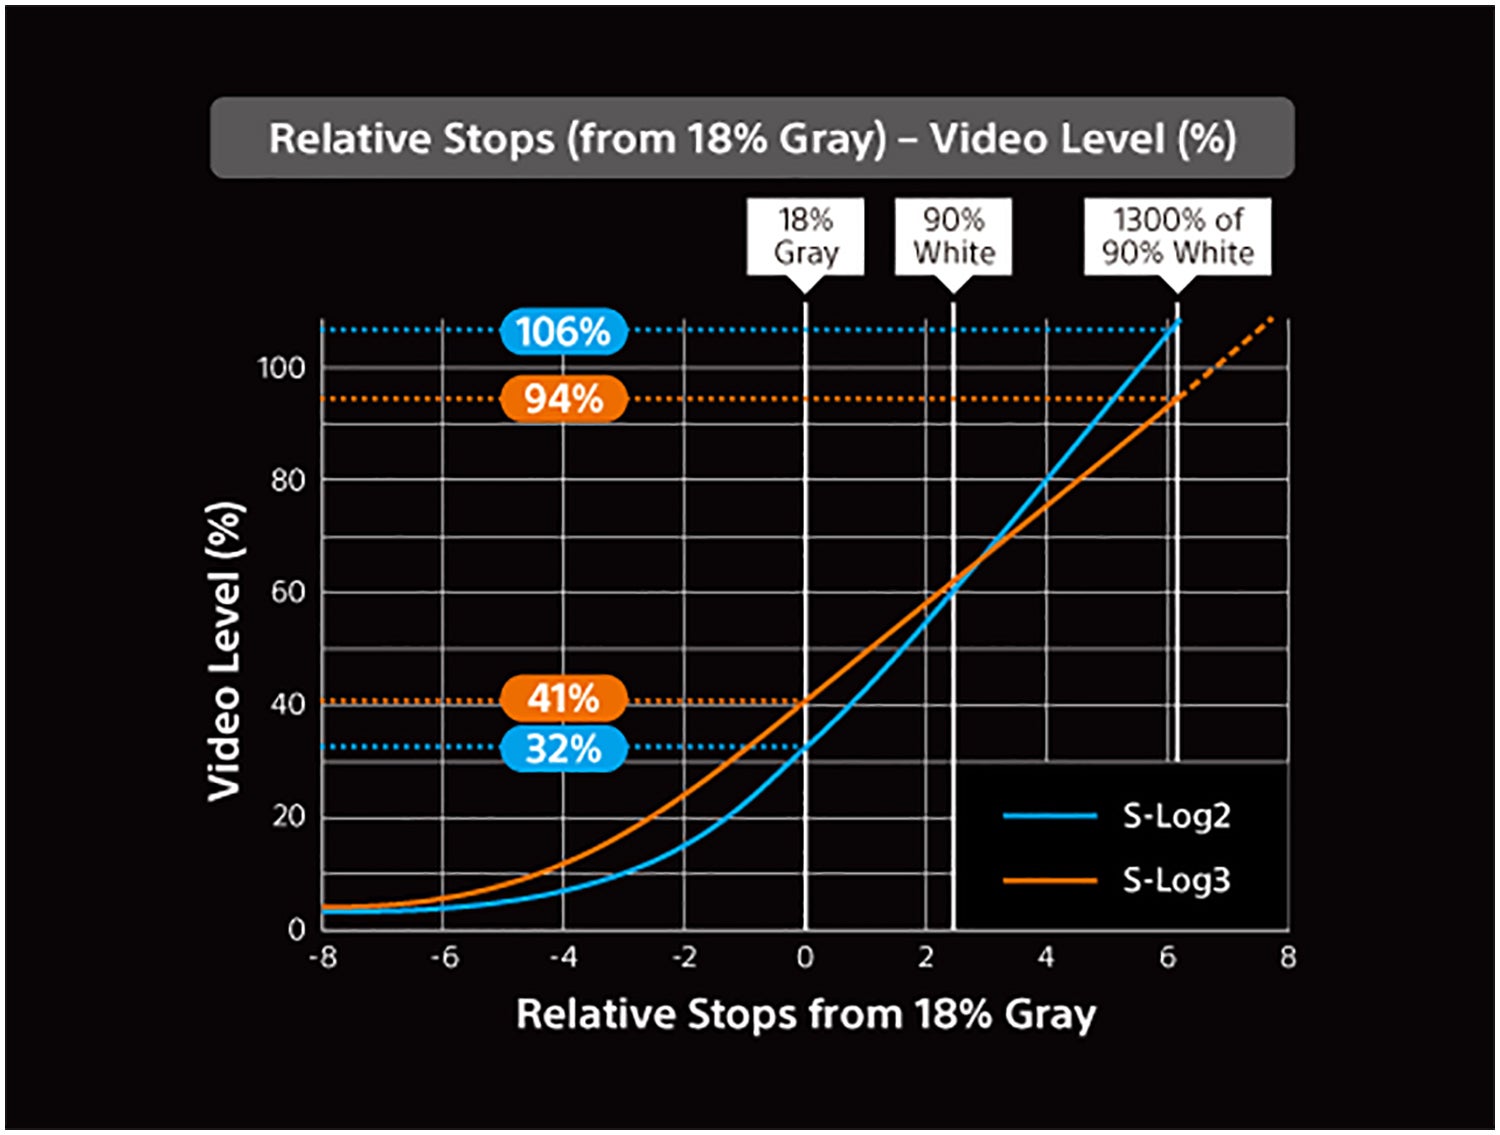
In the real world and in a linear recording such as X-OCN, each time you go up a stop in brightness the amount of light doubles. With X-OCN each time you go up a stop you record that extra stop with twice as much data as the stop below. But S-Log3 is different. Above middle grey each successively brighter stop is recorded with exactly the same amount of data as the one before. Restricting the amount of data allocated to each of the brighter stops allows a big dynamic range to be recorded with a limited bit depth. But, in common with any other camera that uses a log gamma curve or log raw – we are giving up the ability to record the finer textures and details in those very big highlight stops, details and textures that are retained in the linear X-OCN recordings.
For SDR (standard dynamic range) productions this may not be an issue. But as we move into an age of High Dynamic Range (HDR) displays where the highlights can be reproduced with much greater accuracy than in the past, the ability to retain highlight details and textures is becoming more and more important.
An important consideration for both linear X-OCN and S-Log3 is that neither “roll-off” the highlights in a traditional sense. Both go from their respective recording mode to clipping instantly. This is important to understand as what this means is that even very bright highlights, right on the verge of clipping still contain highly useable picture information. Conventional gamma curves such as Rec-709 normally incorporate some form of highlight roll off that compresses the highlights. These roll-offs reduce highlight contrast, detail and texture. As a result, it is often impossible to recover useable textures and details from the brighter parts of a recording done with a conventional gamma curve even though they may not actually be clipped.
The fact that S-Log3 does not have a highlight roll off and the fact that a linear recording such as X-OCN allocates more data to the brighter parts of the image than the shadows means that generally speaking a brighter exposure will almost always be preferable to a darker one. A brighter exposure will give post production more data to work with than a darker exposure.
Exposing brightly and putting more light on to the sensor will result in an improved signal to noise ratio (I know – we are filmmakers, not engineers, but this stuff is important to understand). Basically – more light leads to a bigger signal from the sensors pixels which makes it easier to separate the desirable image from the sensors background noise.
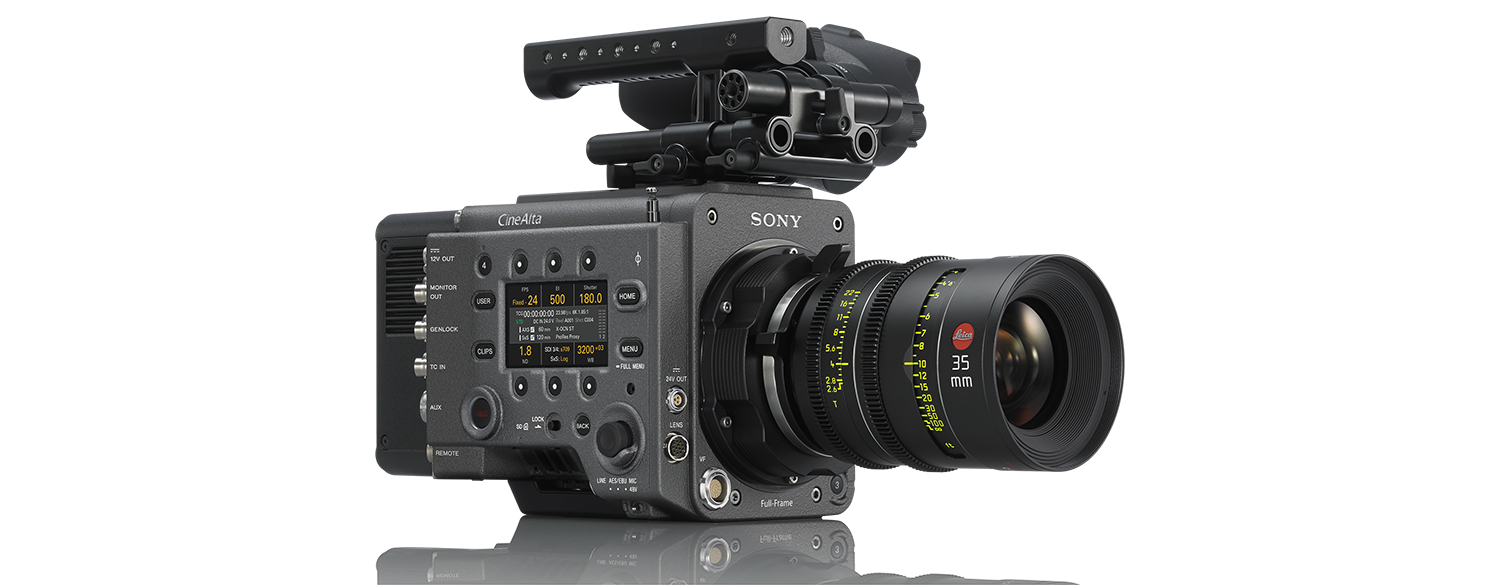
VENICE is a very low noise camera to start with. Even at 2500 ISO the noise level is low. So we don’t need to overdo our exposure. If you like to have a touch of very fine grain in your images then shooting at 2500 ISO will give you that in a very pleasing way. Set a VENICE to 500 ISO and rate it at 500 EI and you will get very clean images straight out of the box. There’s no need to do anything special. But if you are doing a lot of compositing or need an ultra clean image then you could consider rating the camera 1 stop lower. By using 250 EI and 250 ISO on your light meter your recordings will be 1 stop brighter. After correction for this in post production this will result in half as much noise as you would have at 500.
For each stop that you rate the camera 1 stop slower you will halve the noise in the final output. Similarly for each stop you rate the camera 1 stop faster you will double the noise in the final output. For me that’s the important one: If you rate the camera faster and as a result put less light onto the sensor, or if you accidentally under expose, then the noise doubles for every stop. In addition, you will be putting your mid range lower in the recording range. So with S-log3 you may have some of your mid range below middle grey where there is less data. With X-OCN, for every stop you go down, your mids will have half as many tonal values.
So, in my opinion, while I feel there is normally no need to rate VENICE at a lower ISO than the two base ISOs, under exposure or higher EI’s should be avoided as this will result in more noise and a “thinner” recording. If you want the very best shadow range and an ultra low noise recording then there may be occasions where shooting at 500 ISO (2500 ISO) and rating the camera at 250 EI (1250 EI) might be beneficial.
Of course exposing a bit brighter does mean you will slightly decrease your highlight range, but anything you lose off the highlights you will gain in the shadows. Even though the VENICE viewfinder is very good, it cannot show absolutely everything the camera is capable of capturing. Sometimes the viewfinder image may look uncomfortably bright, or highlights may possibly look over exposed. This can lead to you to being tempted to close the aperture a bit. The cameras “VF Highlight Clip Indicator” function is very useful for showing you what is actually clipping at the sensor level and is more reliable than relying on the viewfinder image alone. But do try not to over prioritize protecting the highlights, after all you don’t really want to compromise the mid range and shadow exposure for the sake of a few specular reflections.
Make use of the cameras “VF High/Low Key” function. Once assigned to a user key it allows you to temporarily shift the viewfinder monitoring range down so that you can better see and understand what is really going on in the highlights. Pressing the key a second time shifting the range up so you can also see the deepest shadows, third press return you to the normal mid range view. It’s a very useful tool. It’s also really good for looking at how any clipped highlights might actually appear after the image has been graded or tweaked in post.
