05-28-2020 - Gear, Technology
FX9 Firmware Version 2 - 16-Bit RAW - Deep Dive
By: Alister Chapman
Many years ago Sony introduced RAW to the world of lower cost video cameras when they released a firmware update for the then very popular FS700 camcorder. The update allowed the camera to output 12-bit linear RAW over SDI. It was then up to the owner to choose how to record that output. Options included recorders from Sony (R5 recorder with IFR5 adapter), Convergent Design and Atomos. This output, known as “FS-RAW” proved highly popular as it allowed cameras with perhaps more limited internal codecs to make high quality, high dynamic range recordings with great post production flexibility. Since then FS-RAW has also been available from the PXW-FS5 as well as the PXW-FS7 and FS7 MII.
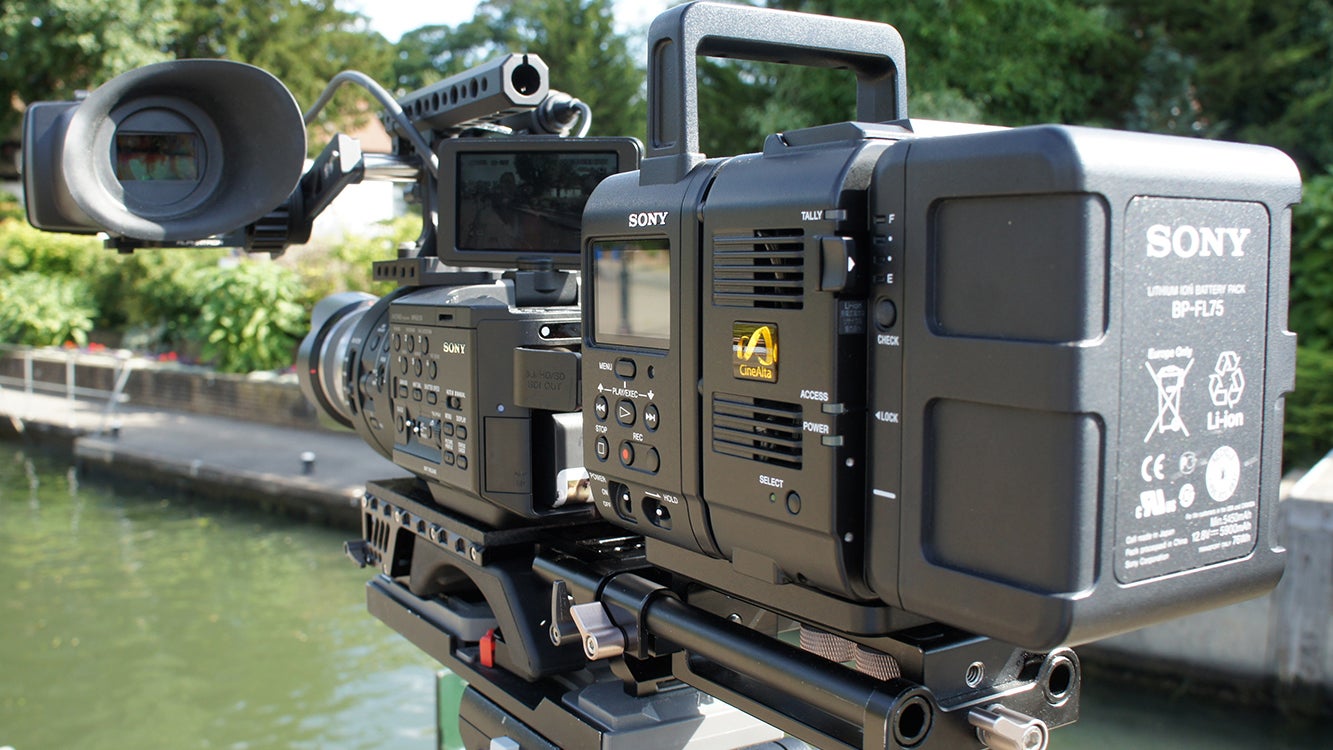
The Sony FS700 with IFR5 and R5 RAW recorder
Sony digital cinema cameras such as the F5/F55 and VENICE can record Sony RAW and X-OCN on Sony’s R5 (F5/F55 only) and R7 recorders. X-OCN, for eXtended tonal range Original Camera Negative, is a 16-bit recording format that takes the camera’s sensor output and records that using clever compression to create a compact 16-bit file comparable to RAW that is very user friendly, while preserving everything the cameras sensor can deliver. In the world of high-end digital cinematography, it’s generally considered that the minimum bit depth required to record high quality, high dynamic range RAW is either 16-bit linear or 12-bit log. Anything less than this is a compromise. 10-bit RAW typically offers no image quality benefit over conventional 10-bit component log recordings.
So, what’s so special about RAW (or X-OCN)?
A quick search on the internet will produce many reasons as to why RAW is special. You will typically find things such as “greater post production flexibility,” “greater dynamic range,” “higher quality,” “exposure flexibility” and “change the camera settings in post.” But all of these should also come with a warning – just as with any codec or recording format, it depends on the quality of both the camera itself and the quality of the RAW output.
One thing that is almost never actually true is “RAW will give you a greater dynamic range.” The dynamic range of most cameras is limited by the sensor. Normally it makes no difference to the dynamic range whether you record using log or RAW. And speaking of sensors, the sensor absolutely has a direct impact on the quality of the RAW, the better the sensor the better the RAW. RAW cannot turn a mediocre sensor into a great sensor. RAW won’t make a camera see in the dark, for example.
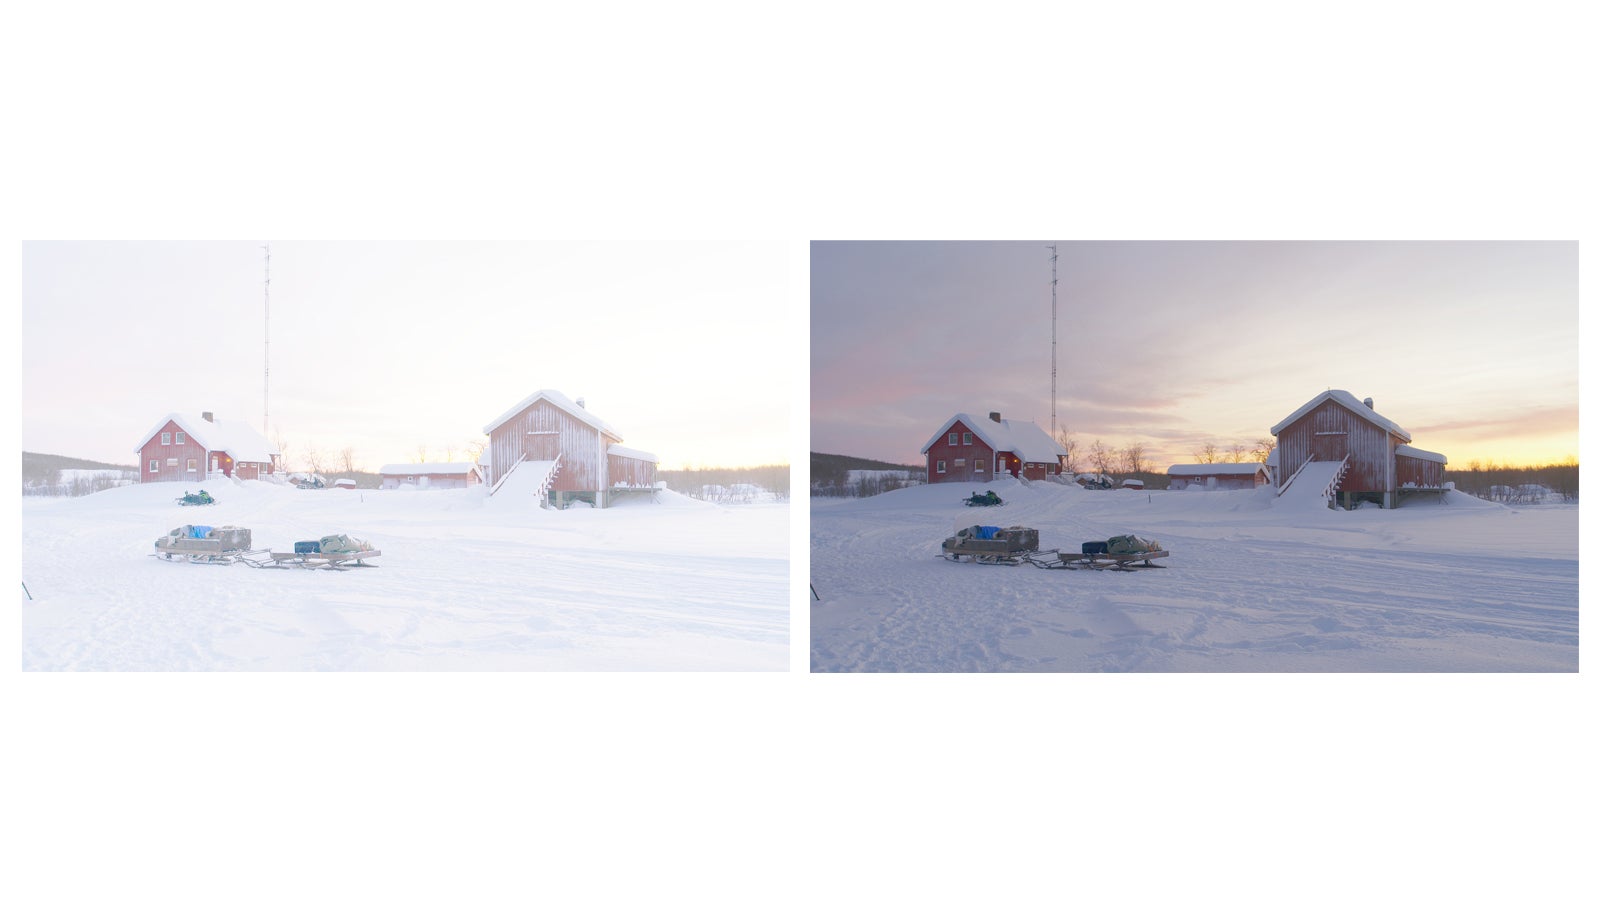
Above left photo: An overexposed clip with a standard LUT will look hugely overexposed.
Right photo: The same overexposed clip with a LUT that includes compensation for the overexposure, or where the exposure has been corrected before the application of the LUT can be made to look great, whether it’s S-Log3 or Raw.
What about exposure flexibility? Again, this is a bit of an internet myth. Often you will see examples of hugely over exposed RAW footage on the internet that has been magically converted into perfectly correctly exposed footage. This isn’t something unique to RAW. You can also overexpose log footage and with the right LUT or grading, this too can be restored to a normal looking exposure.
If the camera you are using clips at six stops above middle gray in log, then it will also clip at six stops over middle gray when shooting RAW. So both log and RAW will have similar over-exposure headroom. But there may be a difference in how many textures your highlights have. Log gammas such as Sony’s S-Log3 allow you to record very large dynamic ranges with conventional recording codecs by reducing the amount of data needed to record the highlight range. This is generally considered to be visually lossless as human vision is less sensitive to highlight details and textures than to mid-range textures. In addition, standard dynamic range TVs and monitors can’t show large highlight ranges, so the highlights end up compressed. So, for many applications S-Log3 works very well indeed.
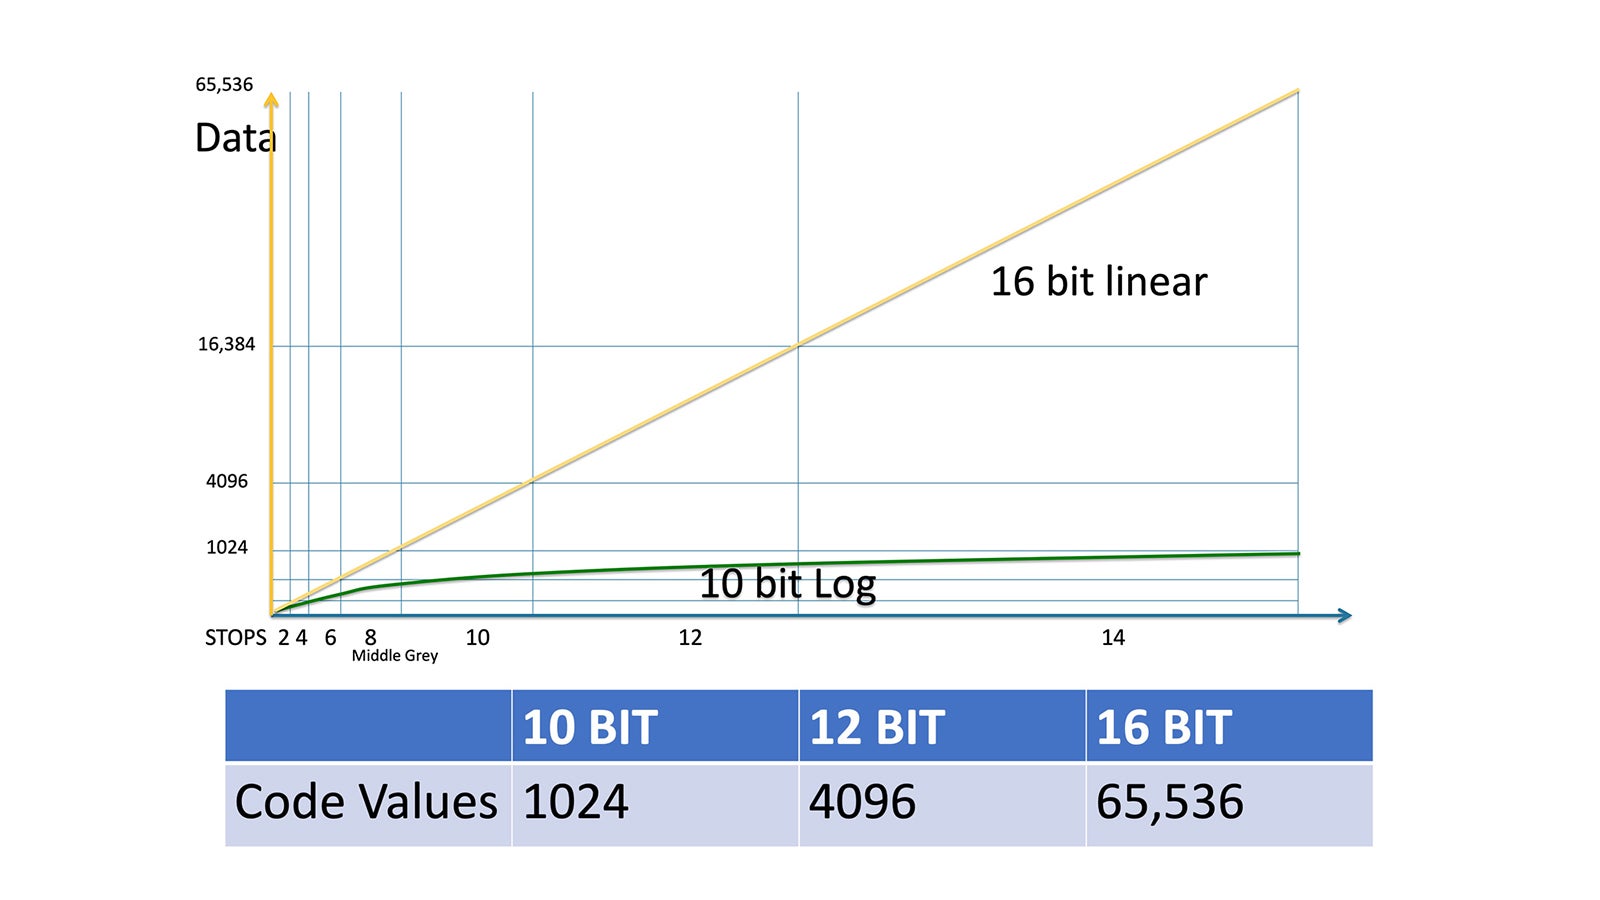
But, with HDR displays and HDR content delivery becoming commonplace, the need to preserve highlight textures and details is becoming more important. In addition, if you can preserve more of the upper mid-range and highlights without compromise, when you do need to start manipulating or color grading, your content will have more data to work with. 16-bit linear allows you to capture a scene as it actually is with no compromises. 10-bit RAW, as used in some of the “RAW lite” formats appearing on the market, won’t allow you to record any additional textures over a conventional internal 10-bit component recording. So when choosing a camera to shoot RAW, make sure you understand exactly what it records as not all flavors of RAW actually bring any real benefits.
What is RAW?
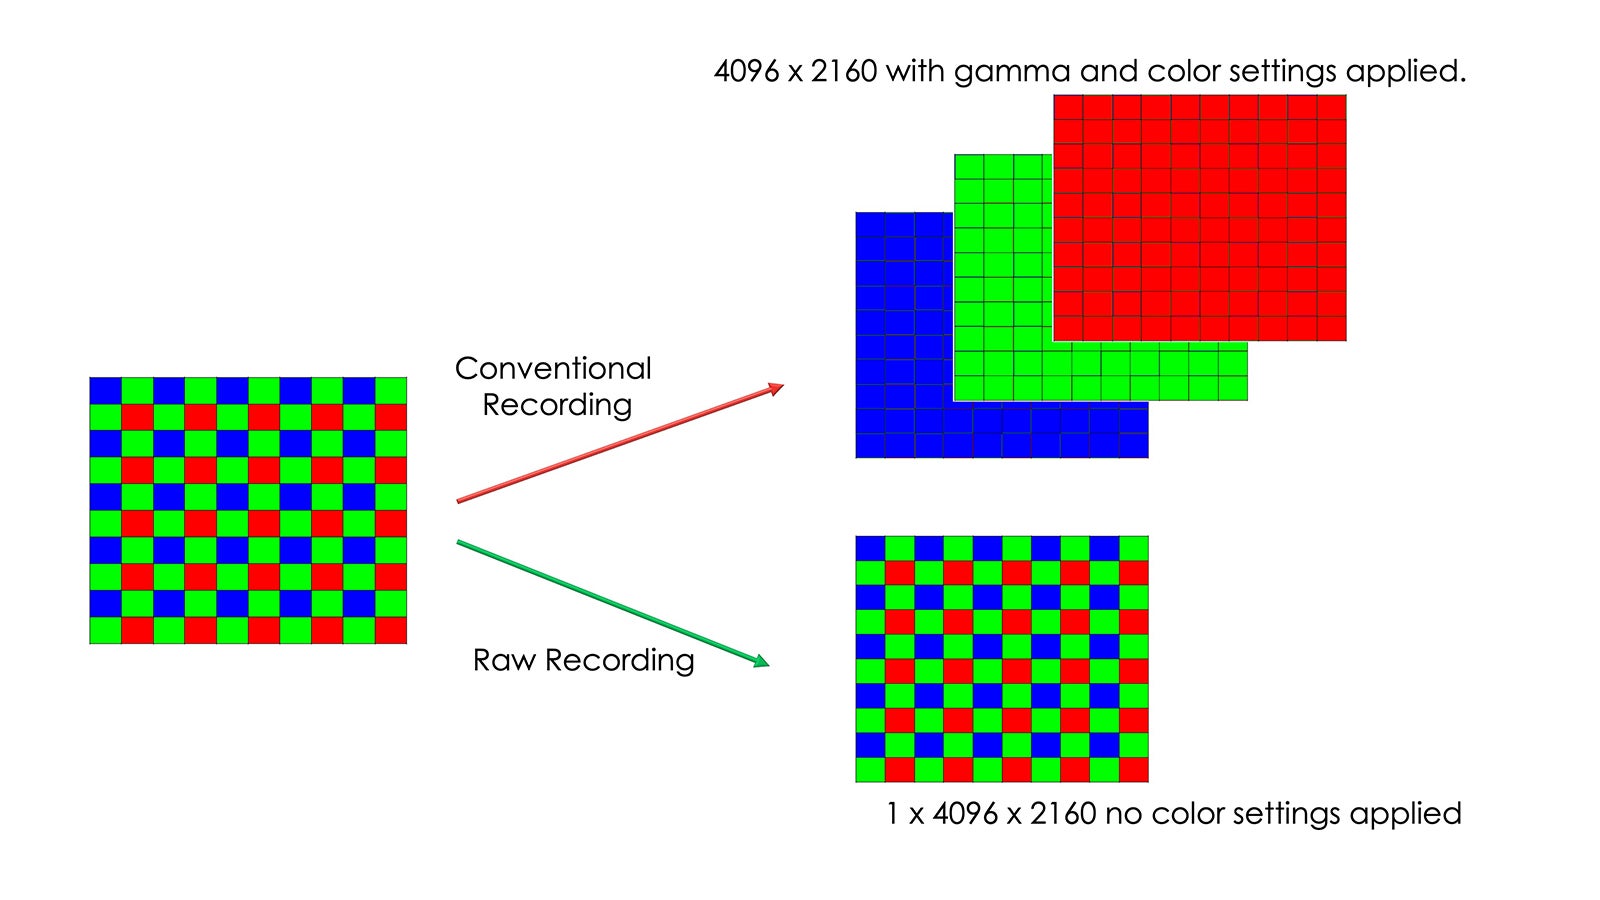
But what is RAW anyway? The generally accepted concept is to take the data from the sensor and record that without any processing. But what does that really mean? For a start, some processing is inevitable. The pixels on a sensor are analog and that analog signal has to be converted to a digital one, part of that conversion process normally includes some pixel-level noise reduction. Then, whatever comes off the sensor will need to be formatted so that it can be output to be recorded, so the RAW is almost never totally processing free. But the one key process that isn’t done is the de-mosaic process that converts what comes from the sensor into a color image.
RAW as we know it today is only really practical from cameras that use a single sensor that has a color filter array (CFA) above the pixels. The most common form of this is the “Bayer” sensor. The pixels on a sensor simply measure brightness, and all they output is a luminance value. So the output from a Bayer sensor is actually just a greyscale image and when we talk about recording “the data from the sensor,” what we are actually recording is a stream of greyscale bitmap images. Because each of the pixels is under a color filter, the luminance value stored for each location in that bitmap can be converted to brightness values for either red, green or blue depending on the color filter that was above the pixel on the sensor. Then from those R, G and B values we can reconstruct full color images.
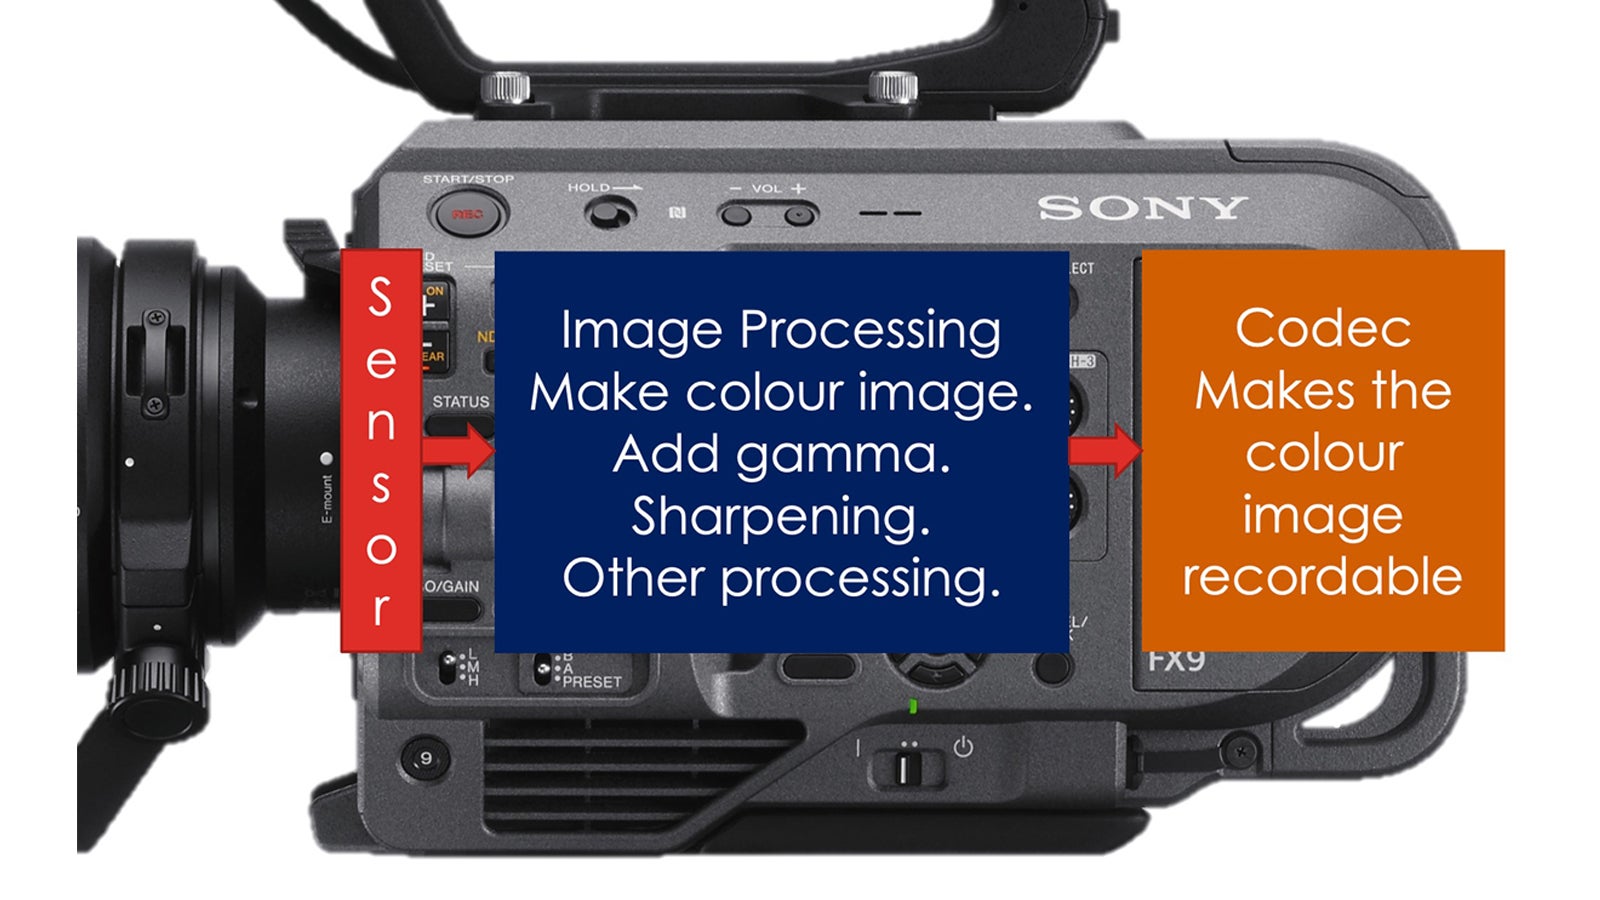
With a conventional component recording, such as when you record internal XAVC, that conversion process, called de-mosaicing or Debayer, is done in real time inside the camera by the camera’s processing circuits. When recording RAW, we do the conversion in the grading suite where we can make use of a high-powered computer to do the number crunching.
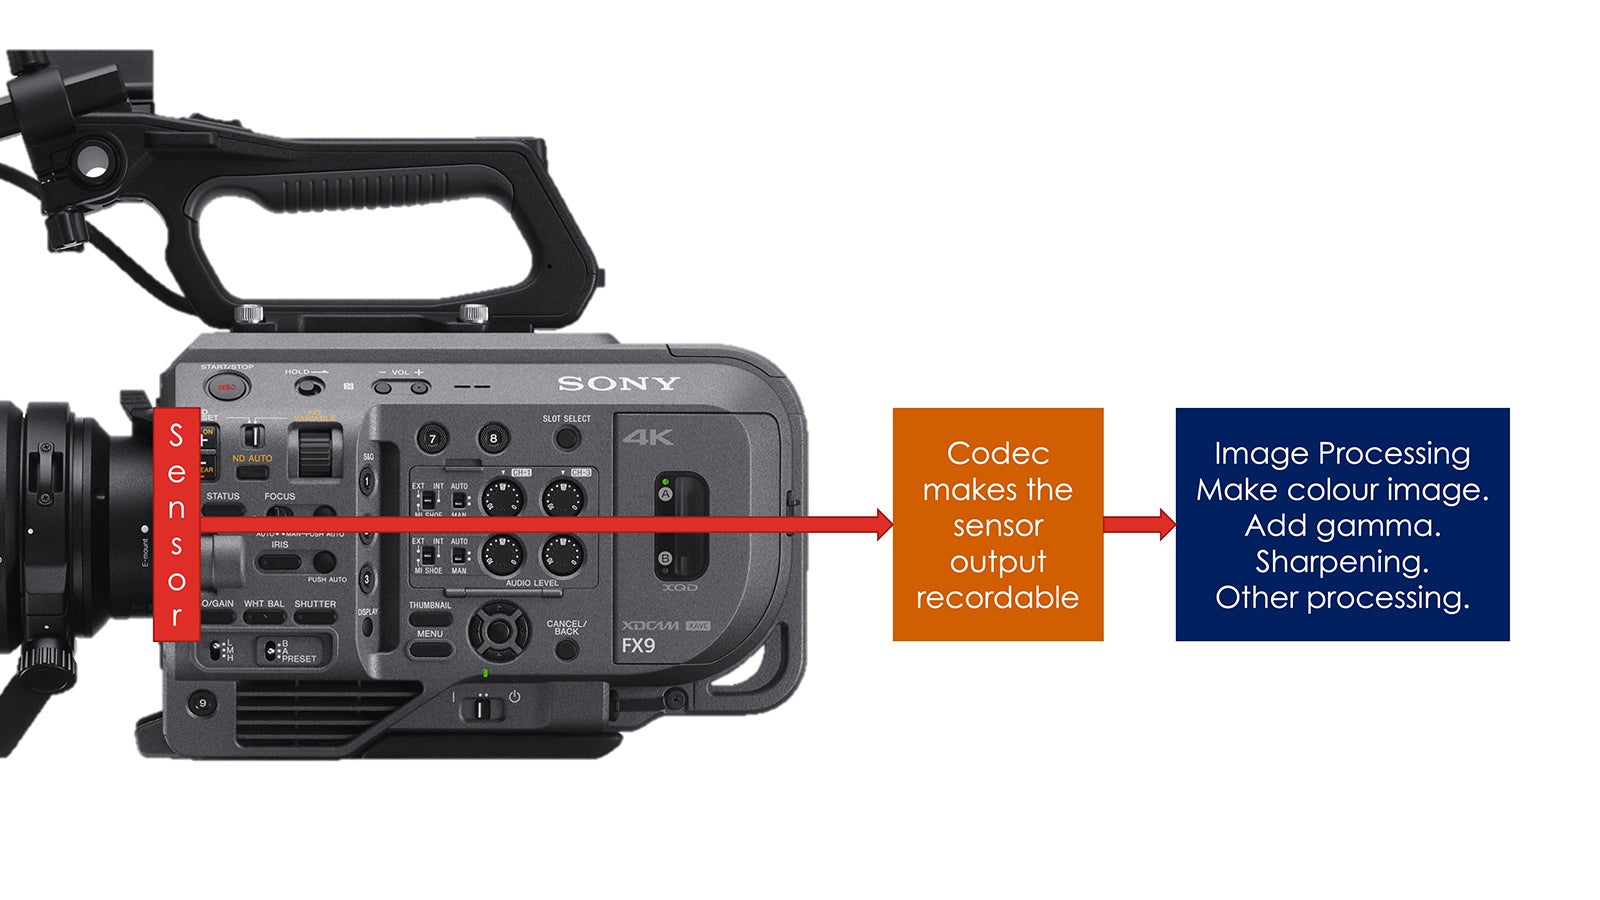
Because we are doing the conversion to color in the computer, if you need to make large corrections to things like the white balance, you will generally get a better result working from high-quality RAW than from component log where the white balance was already baked in and set during the in-camera Debayer process. It is the fact that we do the conversion from sensor output to color image in post that gives us that greater post-production flexibility, not only for things like changing the white balance but also when we wish to alter the color palette of the images we are working with such as when color grading. As a result, grading RAW footage can often result in superior results versus grading log footage (assuming the RAW is of high enough quality).
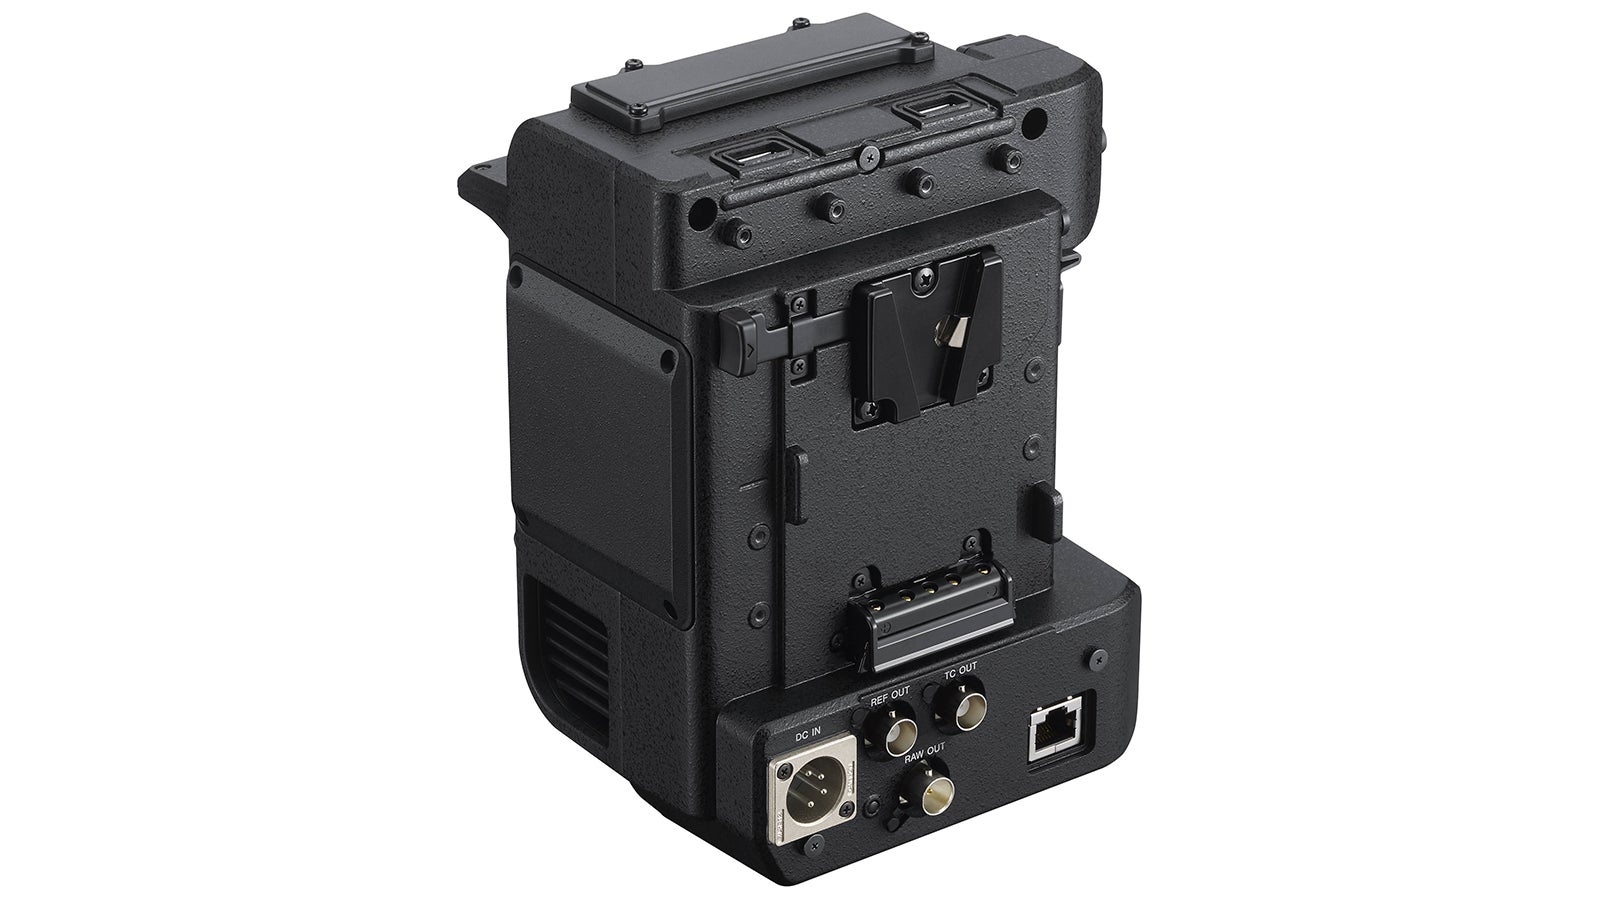
Sony XDCA-FX9 Extension Unit
RAW and the FX9
Coming back to the FX9. Since the camera launch it’s been known that the FX9 would get a firmware update which would enable a RAW output. That RAW output will become available in version 2 of the firmware, which should be available later this year. When shooting 4K at up to 60fps and 2K up to 180fps, the RAW output will be a 16-bit linear RAW stream. The FX9’s roadmap also includes the ability to output 10-bit UHD RAW at up to 120fps but that isn’t coming just yet.
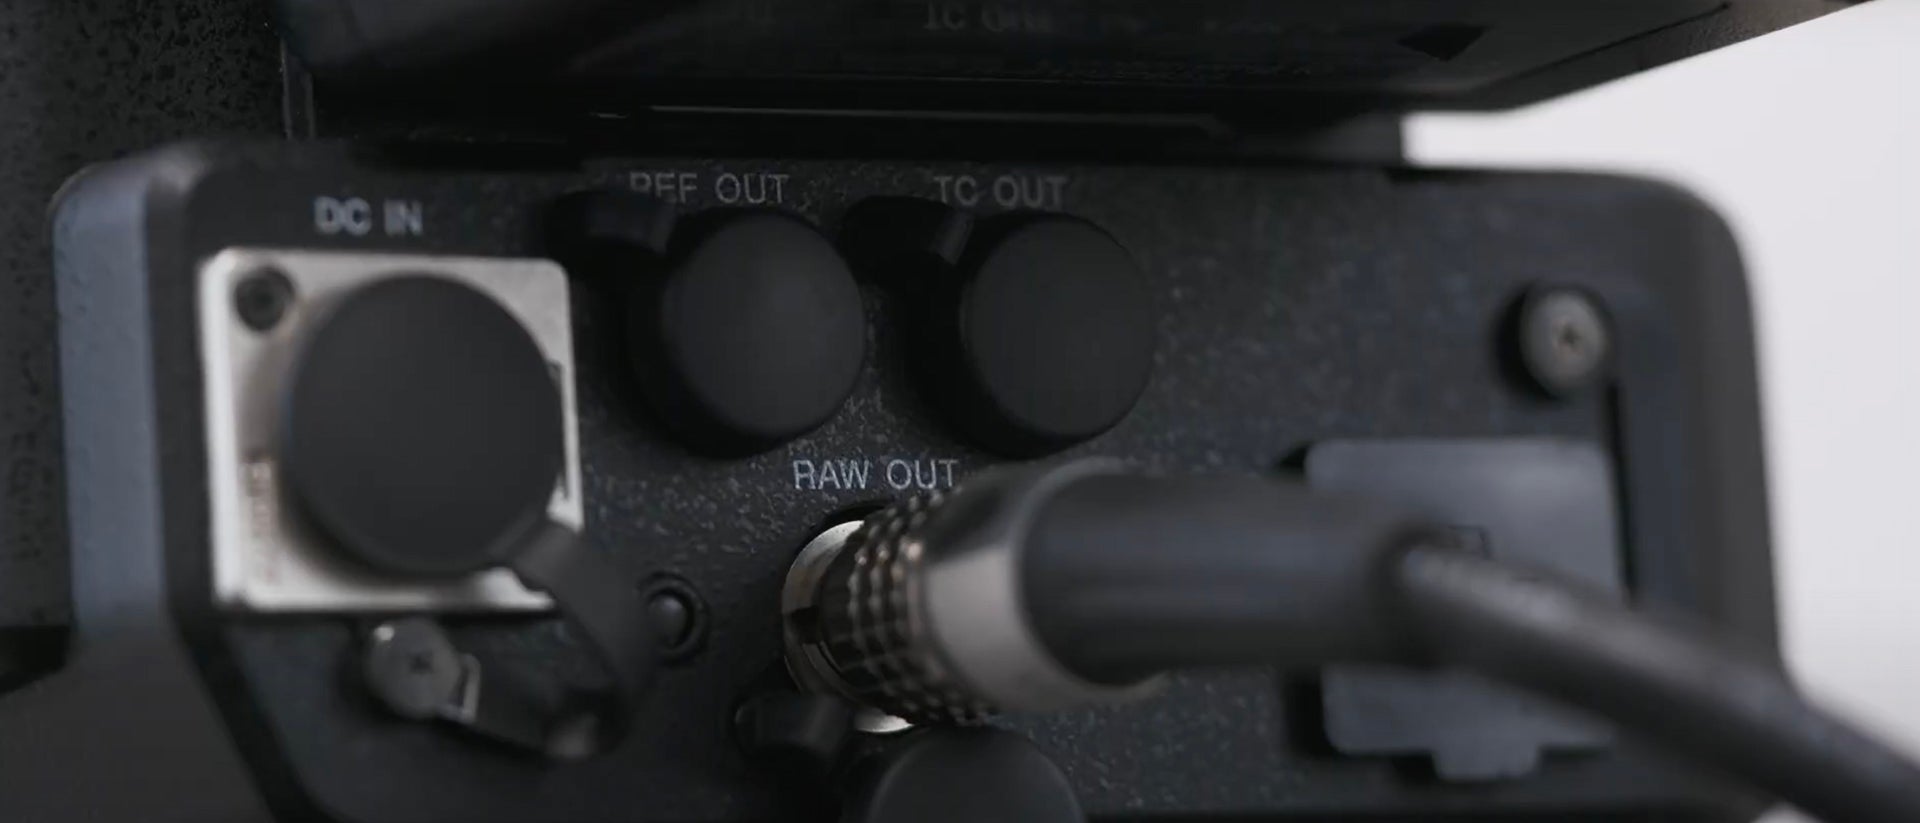
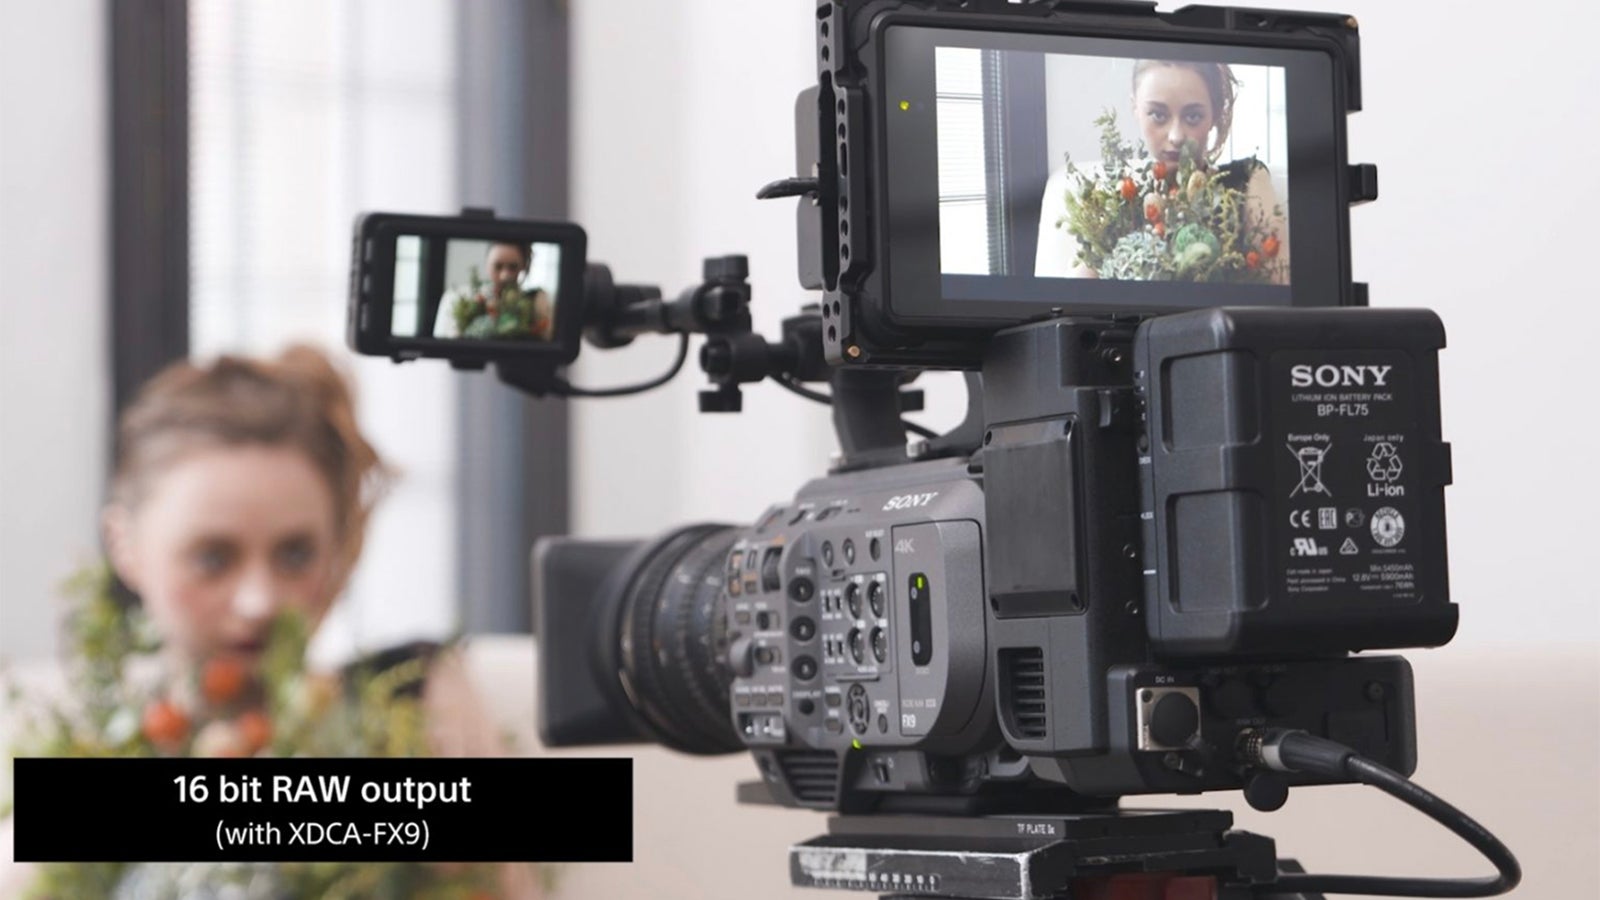
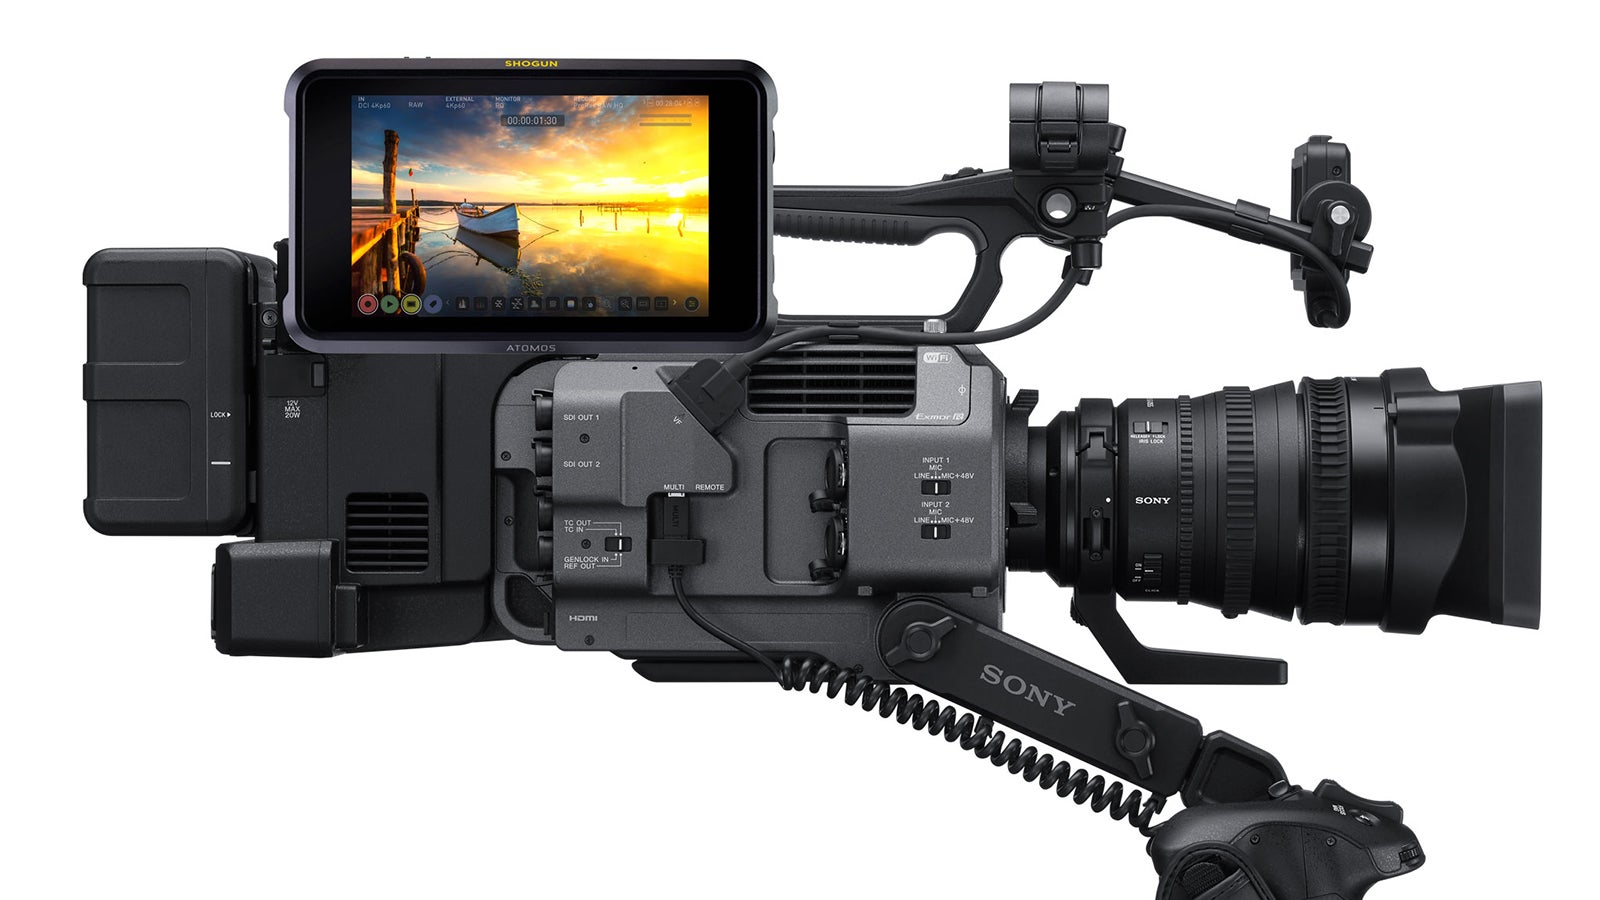
In order to get the RAW output you will need the XDCA-FX9 extension unit, which attaches to the back of the camera, as well as a compatible external RAW recorder. The XDCA-FX9 takes the sensor data from the camera’s data bus and converts it into a format suitable for output over a single SDI connector. You cannot get a RAW output from the FX9 without the extension unit.
When shooting at up to 60fps, the RAW output can be 4K 4096 x 2160 DCI or 2K 2048 x 1080 DCI. Above 60fps and up to 180fps, for now at least you are limited to 2K 2048 x 1080 DCI.
To record RAW the FX9 must be set to the CineEI mode. Once in the CineEI mode the user can then enable RAW output in the camera’s Project, Record Format settings. When outputting RAW it is also possible to record HD within the camera at the same time. This might be useful for recording an HD proxy for editing and the HD recording can have a LUT applied to it and baked in if you wish. Adding a LUT to the internal recording has no effect on the RAW output.
When shooting 4K RAW you can choose between any the camera’s different scan modes. You can only use the Full Frame 6K scan mode for up to 30fps. The Full Frame Crop 5K scan or the S35 4K scan modes can be used for any frame rate up to 60fps. For 2K RAW you can use any of the 2K scan modes all the way up to 180fps. It is worth noting though that due to the way the 2K scan modes work the image quality will be reduced when using 2K scan compared to 6K, 5K or 4K scan. It’s recommended that you expose between 1 and 2 stops brighter than the normal base exposure when using 2K scan, so you may want to use 400EI or 2000EI rather than 800EI/4000EI depending on the base sensitivity mode you are using.
Do note that when shooting 4K and using either the Full Frame 6K or Full Frame Crop 5K mode the RAW output will still be a 4K RAW output. The camera will do an internal downsample of the sensor’s output to 4K DCI. It won’t output 6K or 5K. Some may question whether this still counts as RAW? I believe it does as the output is still just a luminance bitmap and we are still going to be doing the all-important Debayer process in the grading suite later on.
All of this gets us to the point where the camera is outputting the RAW stream from the SDI on the XDCA-FX9. Next we need to record it!
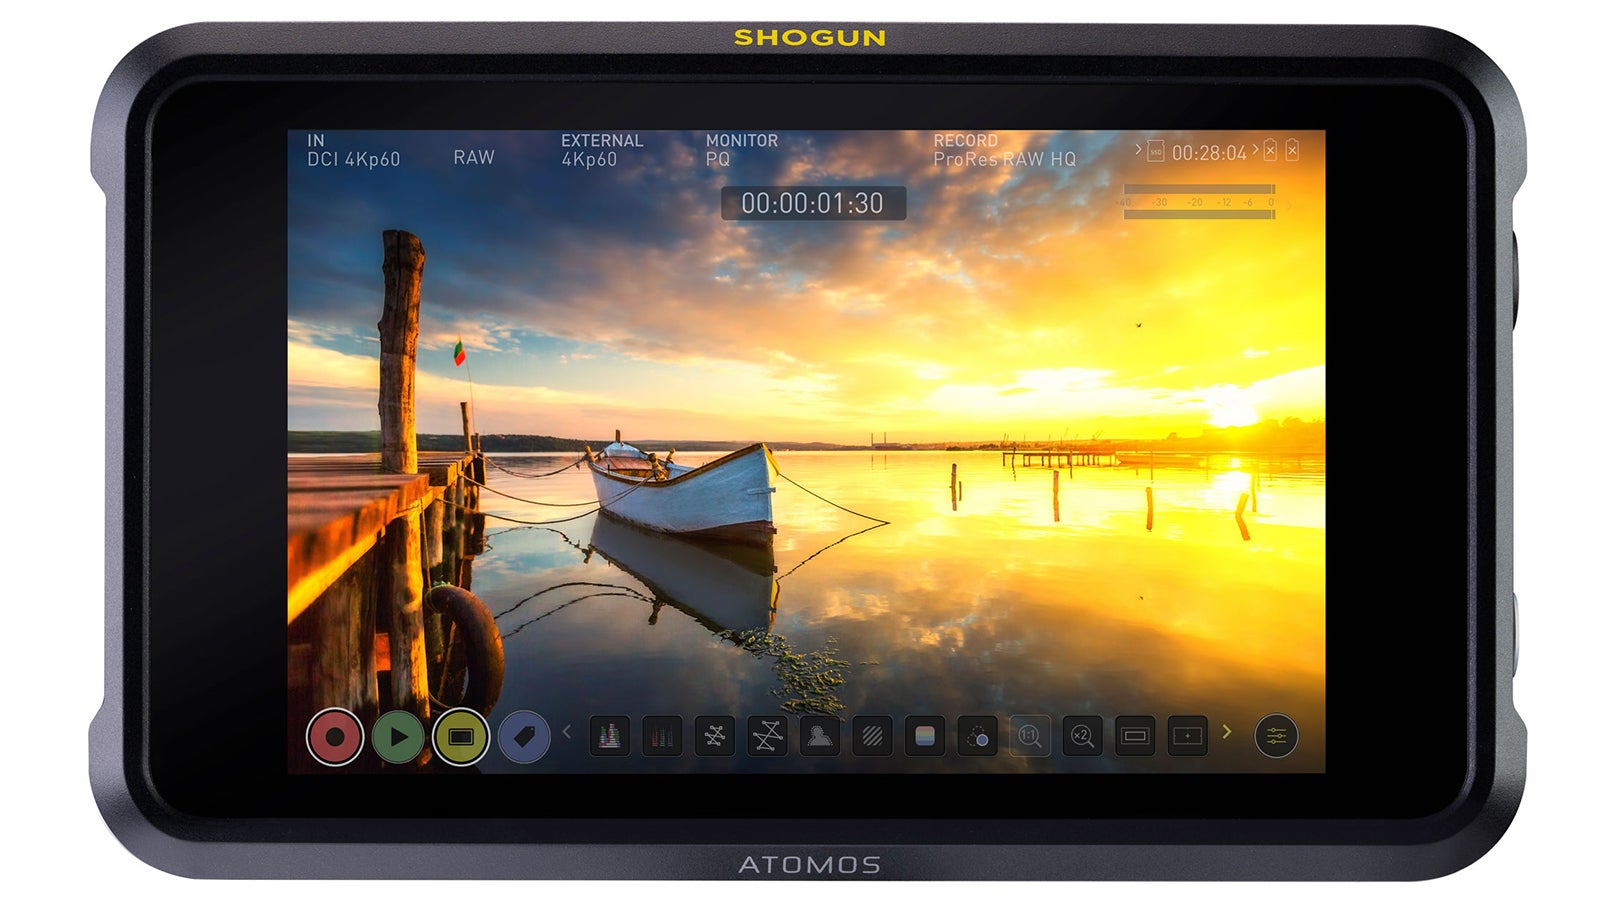
Atomos Shogun 7
Atomos have always supported the RAW outputs from the FS5, FS7 etc., and now, in addition, they are going to be providing RAW recording options for the FX9. The first of those will be via the Atomos Shogun 7 with updated firmware. This new firmware will allow this existing monitor/recorder to record the 16-bit output as 12-bit log RAW or as conventional ProRes. To be honest there isn’t anything to be gained by taking the RAW output and converting it to normal 10-bit ProRes. If you just want to record ProRes you will be better off just taking the camera’s SDI output and recording that using any normal ProRes recorder. But 12-bit log RAW is a very nice format, perhaps not quite as good as 16 bit linear, but it is a great way to keep the size of the RAW files manageable, allowing the existing Shogun 7 to record them onto low-cost SSDs. You will be able to record the RAW using either cDNG or compressed ProResRAW (PRR) with a choice of two different quality levels. ProResRAW HQ or standard ProResRAW.
ProResRAW is a great format. The files are compact. The PRR HQ files are only marginally bigger than conventional ProRes HQ, the standard PRR files are a little more compact but still very useable. The only downside is that at the moment you can only work with ProResRAW in a limited number of edit and grading applications.
Looking Ahead
Looking further ahead: The PXW-FX9 V2 firmware will allow the camera to output full, fat, 16-bit linear RAW, none of that skinny lite stuff. As such, the FX9’s output will be the real deal. However, we may need to wait a little longer for a 16-bit recorder to match. Having said that, 12-bit log RAW is a perfectly reasonable and acceptable compromise, especially as it means you will be able to use off-the-shelf SSDs in a proven recorder that many may already own.
This is a really exciting development for the FX9 and like so many things about the FX9, another one of those things that should improve as the camera matures. Don’t forget too that 4K 120fps RAW is also coming in a later update. I’m really looking forward to shooting RAW with my FX9.
For further information about FX9 Scan Modes, see: FX9 Firmware Version 2 - Scan Modes - Deep Dive


