
03-10-2022 - Gear, Technology, News
Update! AXSM Drive Utility V3.1.0 is Released. Adds Support for Mac with Apple Silicon
By: SonyCine Team
AXSM Drive Utility 3.1.0 Update
https://dmpc.cimediacloud.com/r/GmqORpWndVoI or https://www.sonycreativesoftware.com/axsmdrive
· Support for Apple ProRes and X-OCN clips of VENICE 2
· Support for diagnostic notification and log acquisition of AXS Memory Card
· Support for 64bit Windows 11
· Support for 64bit macOS Monterey 12.2
· Support for Mac with Apple Silicon
Note: When installing on the Mac with Apple Silicon, it is necessary to change the Security Policy setting. See a release note for details.
Operating systems supported
Windows 8.1 64bit
Windows 10 64bit
Windows 11 64bit
macOS Monterey 12.2
macOS Big Sur 11.6.3
macOS Catalina 10.15.7
For more info about VENICE 2, click HERE.
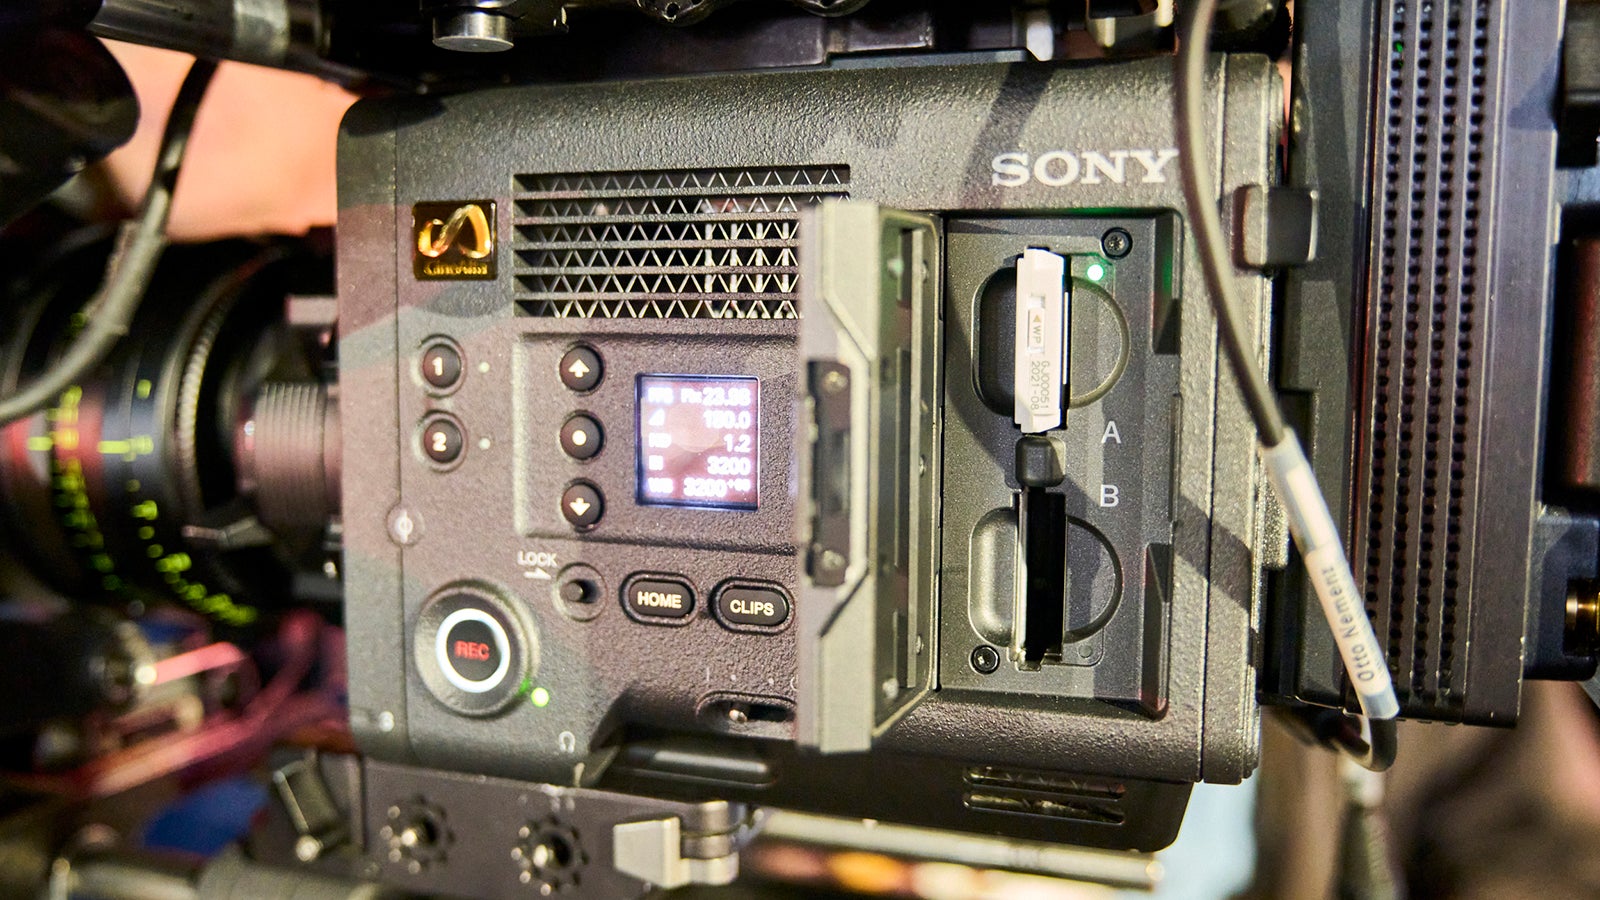
Installing AXSM Drive Software
Double-click AXSMDriveSoftware_3_1_0_mac.dmg or AXSMDriveSoftware_3_1_0_win.exe and follow the
instructions of the installer.
When you upgrade the software on Mac, the older version is overwritten with the new one. Uninstall is not required.
When you upgrade the software on Windows, select the previous version in "Programs and Features", remove it, and then install new version.
After installation, you will be prompted to restart the PC.
When installing on an M1 Mac with Apple Silicon, you need to change the security policy settings.
Before installing "AXS Drive Utility" on a Mac equipped with Apple Silicon, follow the procedure below. You need to change the security policy setting to "Low Security".
Install procedure for Mac with Apple Silicon
1. On the Mac with Apple silicon, select [Shut Down] form Apple menu.
2. Press and hold the power button until you see “Loading startup options.”
3. Click [Options], then click [Continue].
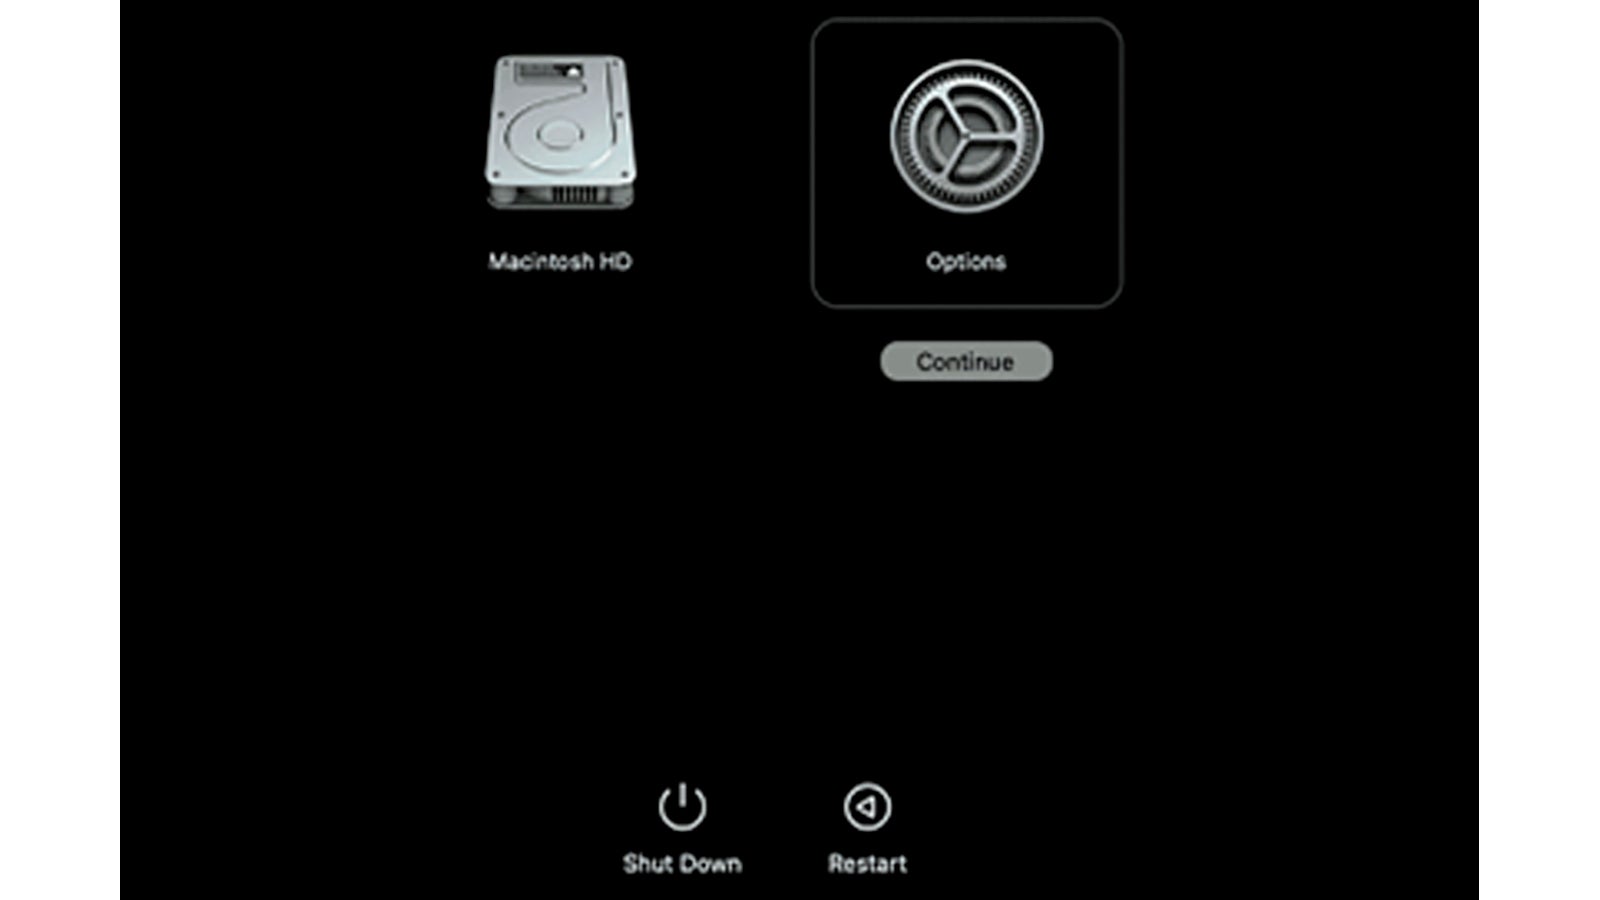
4. In macOS Recovery, if you are prompted for user selection, click [Next] and enter the password for an administrator account, if required.
5. In the Recovery Application, select [Startup Security Utility] from the [Utilities] menu.
6. Select the startup disk you want to use to set the security policy.
If the disk is encrypted with FileVault, click [Unlock], enter the password, then click [Unlock].
7. Click [Security Policy].
8. Select [Reduced Security], then select the [Allow user management of kernel extensions from identified developers] checkbox to allow installation of software that uses legacy kernel extensions and enter the password for an administrator account, if required.
9. Restart your Mac to apply the changes.
Installing on macOS 10.15 or 11.6 or 12.2
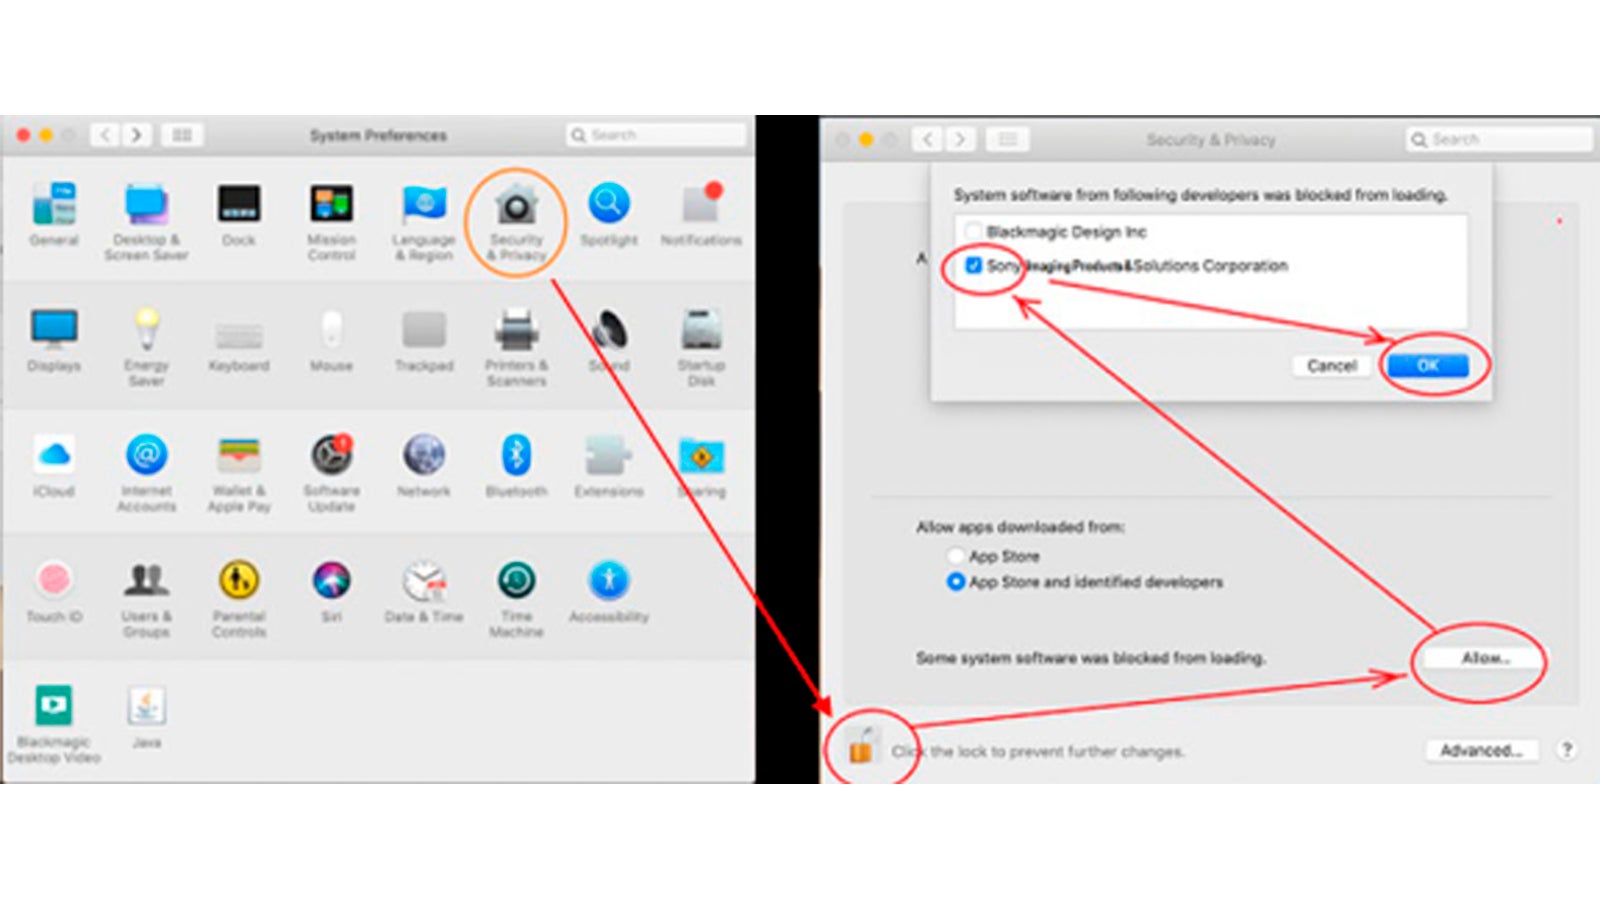
Open the "Security & Privacy" screen of "System Preferences" as shown below, and be sure to "Allow" the "Load system software". Not required if it was already allowed during the previous installation, such as in an overwrite installation. However, if there are any new additions, please check them.
1. Open “Security & Privacy” from “System Preferences”
2. Press the "Allow" button on right side of "System Software was blocked from loading..."
3. Click check box for the System software of “Sony Home Entertainment & Sound Products” and press “OK”.
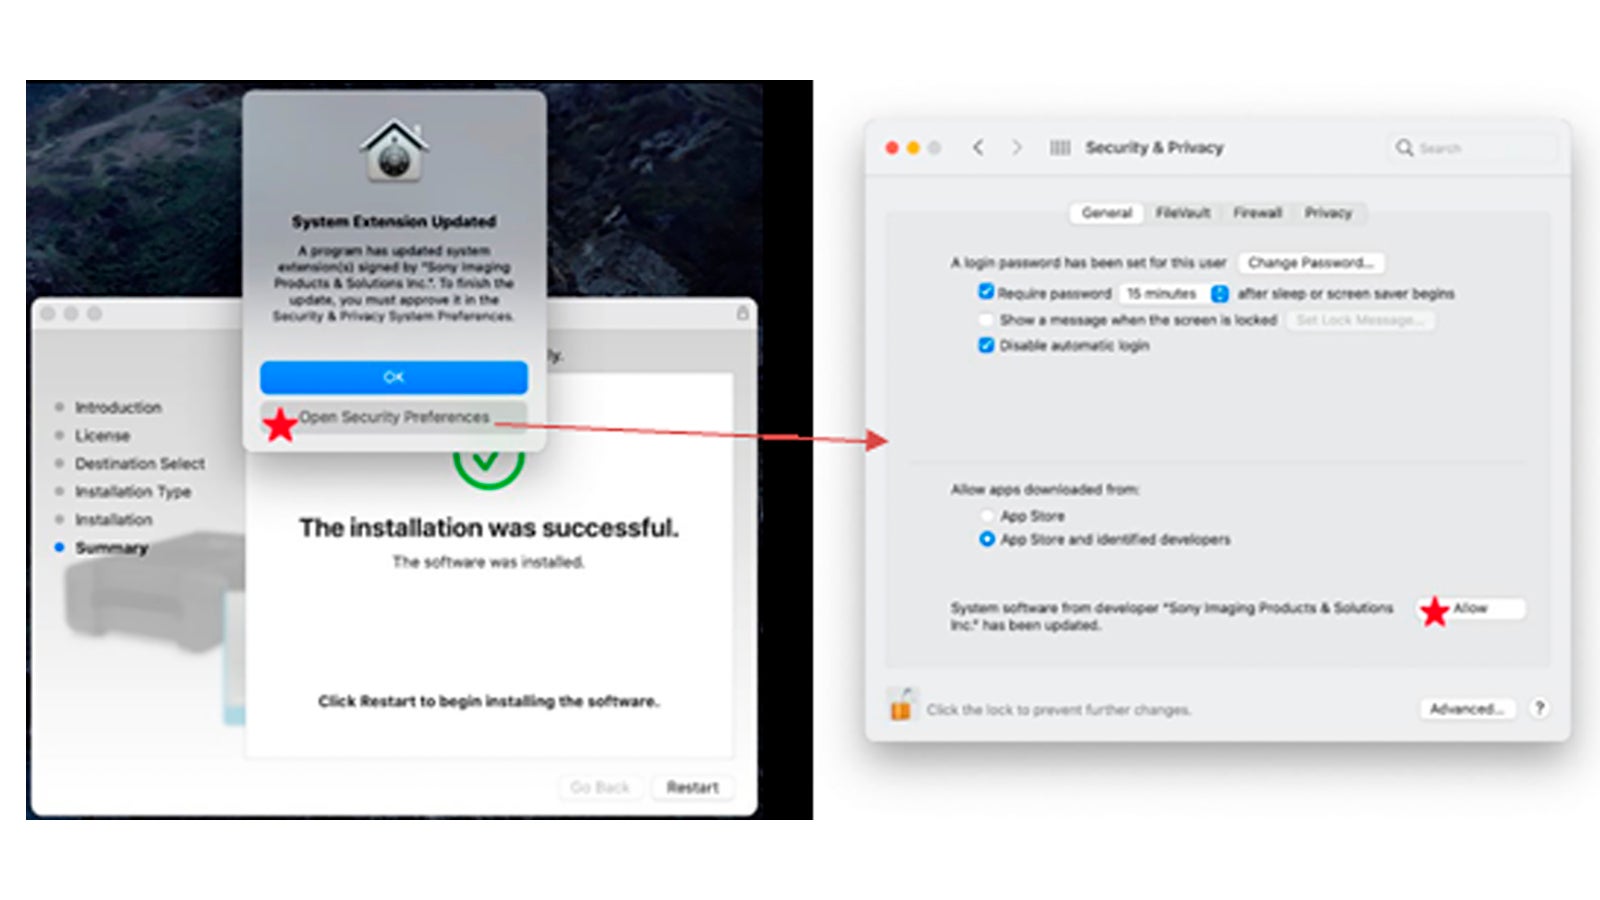
If the following dialog is displayed during installation, select "Open Security Preferences".
This will open the "Security & Privacy" screen. The following is an example for macOS Big Sur.
Note:
If you do not allow it during installation, it will return to its original state after restarting the OS. In that case, run the installer again and set the permission of the System software.
Update 2! AXS-AR1 V1.10 and AXS-AR3 V1.10 is released
Features
· Support AXSA1TS66 media
· Support Mac with Apple Silicon
· Improved response for S.M.A.R.T commands
· Change mount condition for AXS Memory
- If error is detected during mount process it will continue if error is not critical
· Change LED operation when AXS Memory is inserted
- Led Illuminates blue when AXS Memory is accessed during mount process
AXS-AR1 upgrade procedure
- Download AXS-AR1 upgrade file AR1_01_10_631.bin to Mac computer.
https://dmpc.cimediacloud.com/r/wXgBd6GDxLiZ - Connect AXS-AR1 to Mac computer using TB2 cable.
- Open AXSM Drive Utility.
- Insert AXS card into AXS-AR1.
- Select AXS-AR1 and click on Firmware Update.
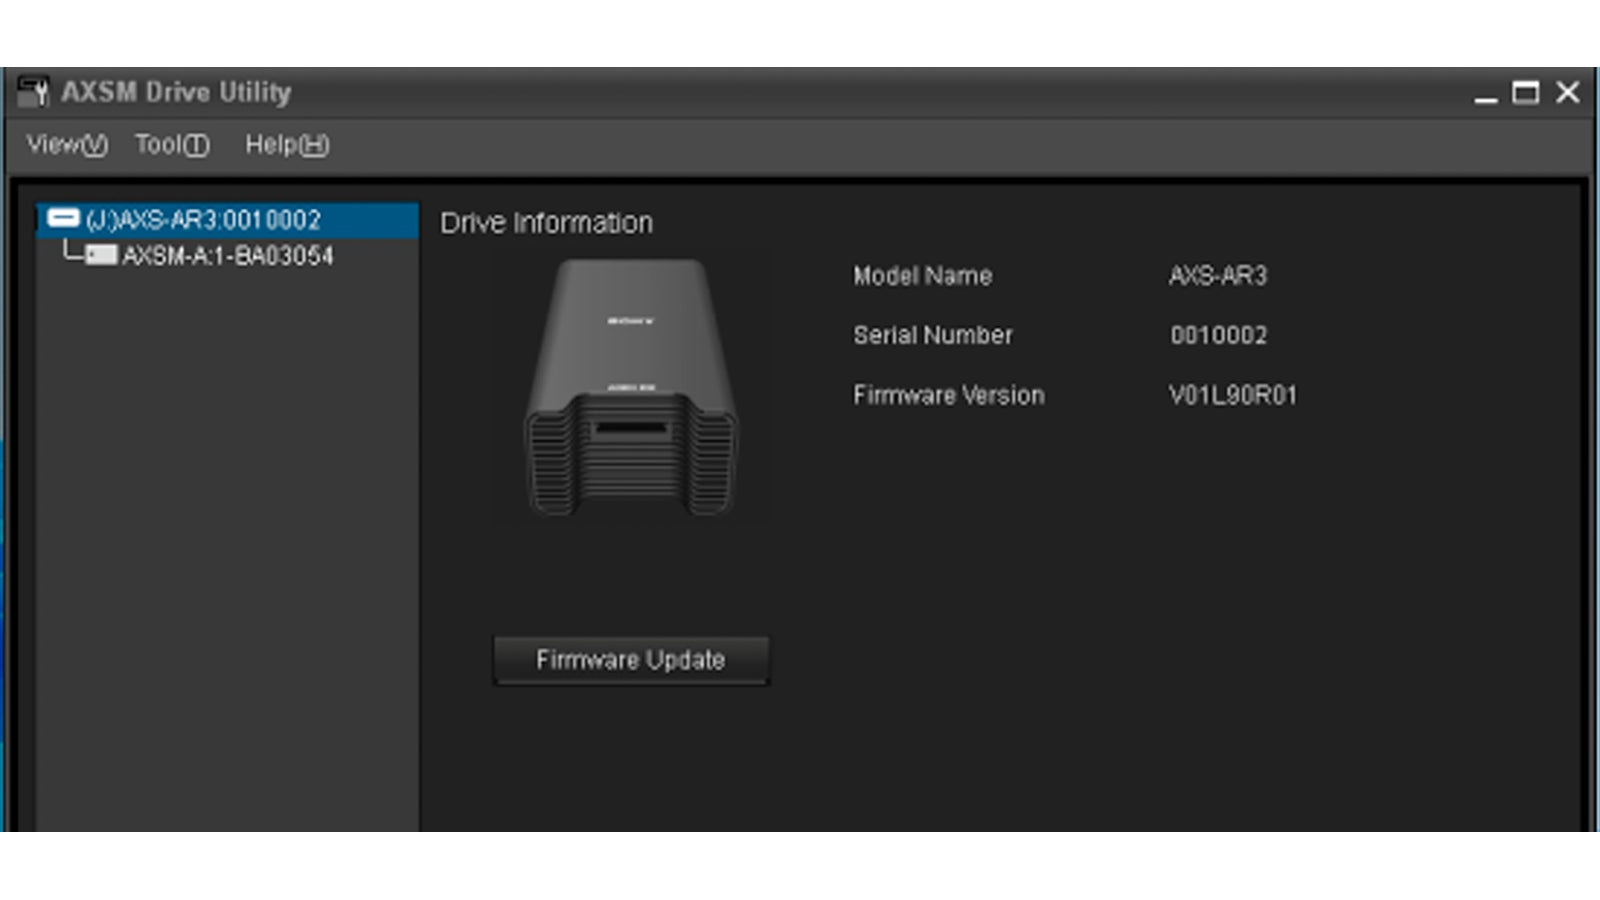
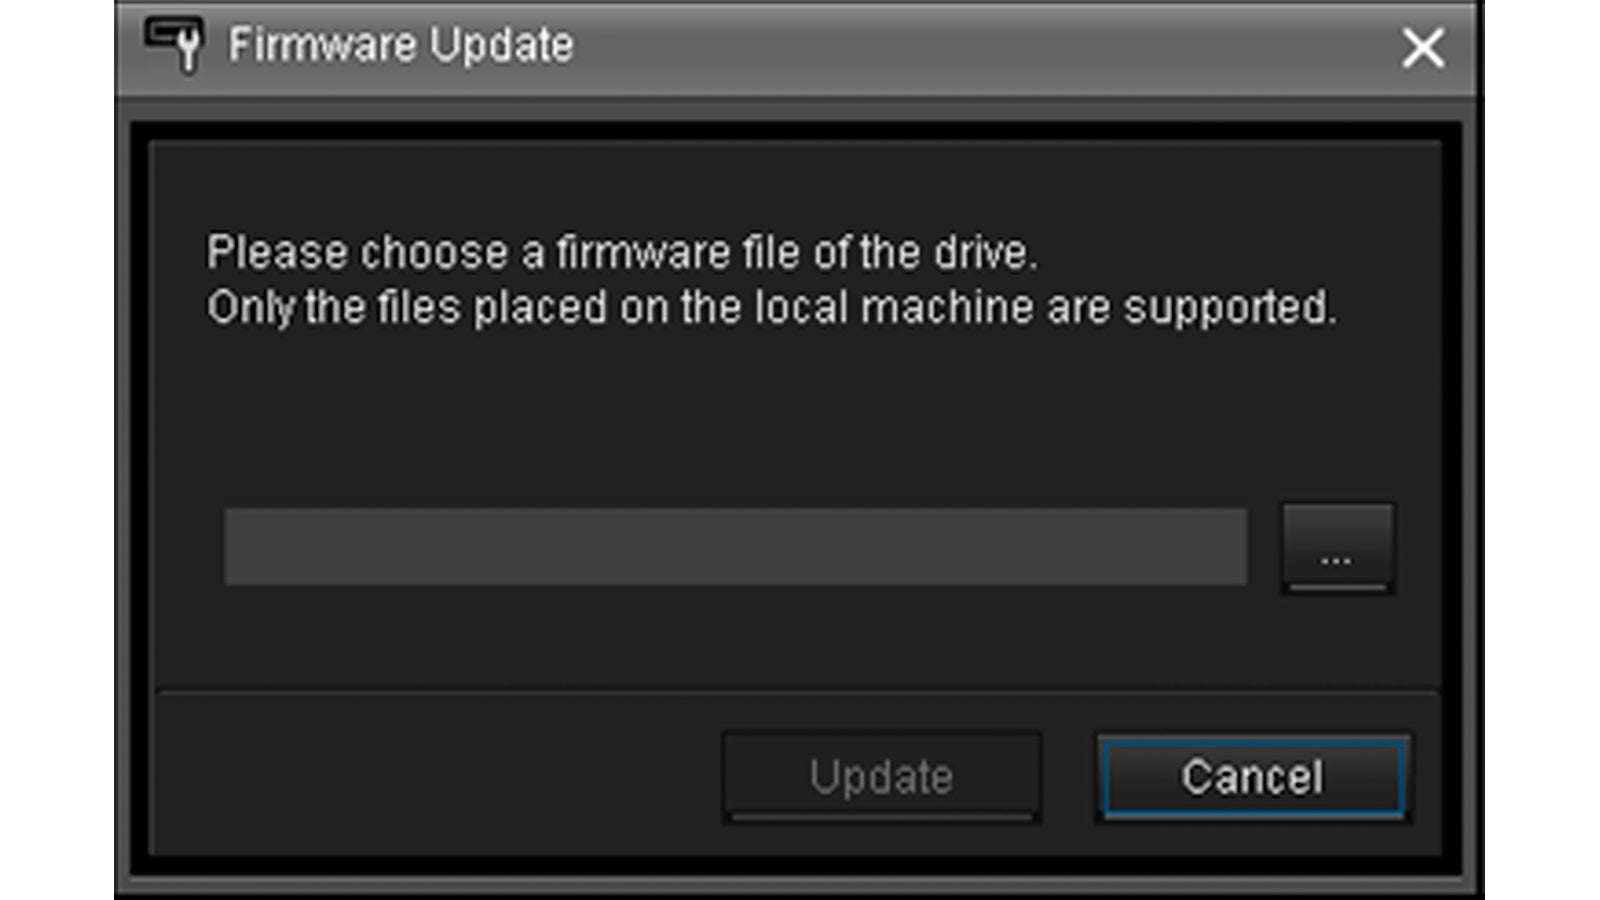
6. Firmware Update window will appear. Browse to location where file AR1_01_10_631.bin is located and click Update.
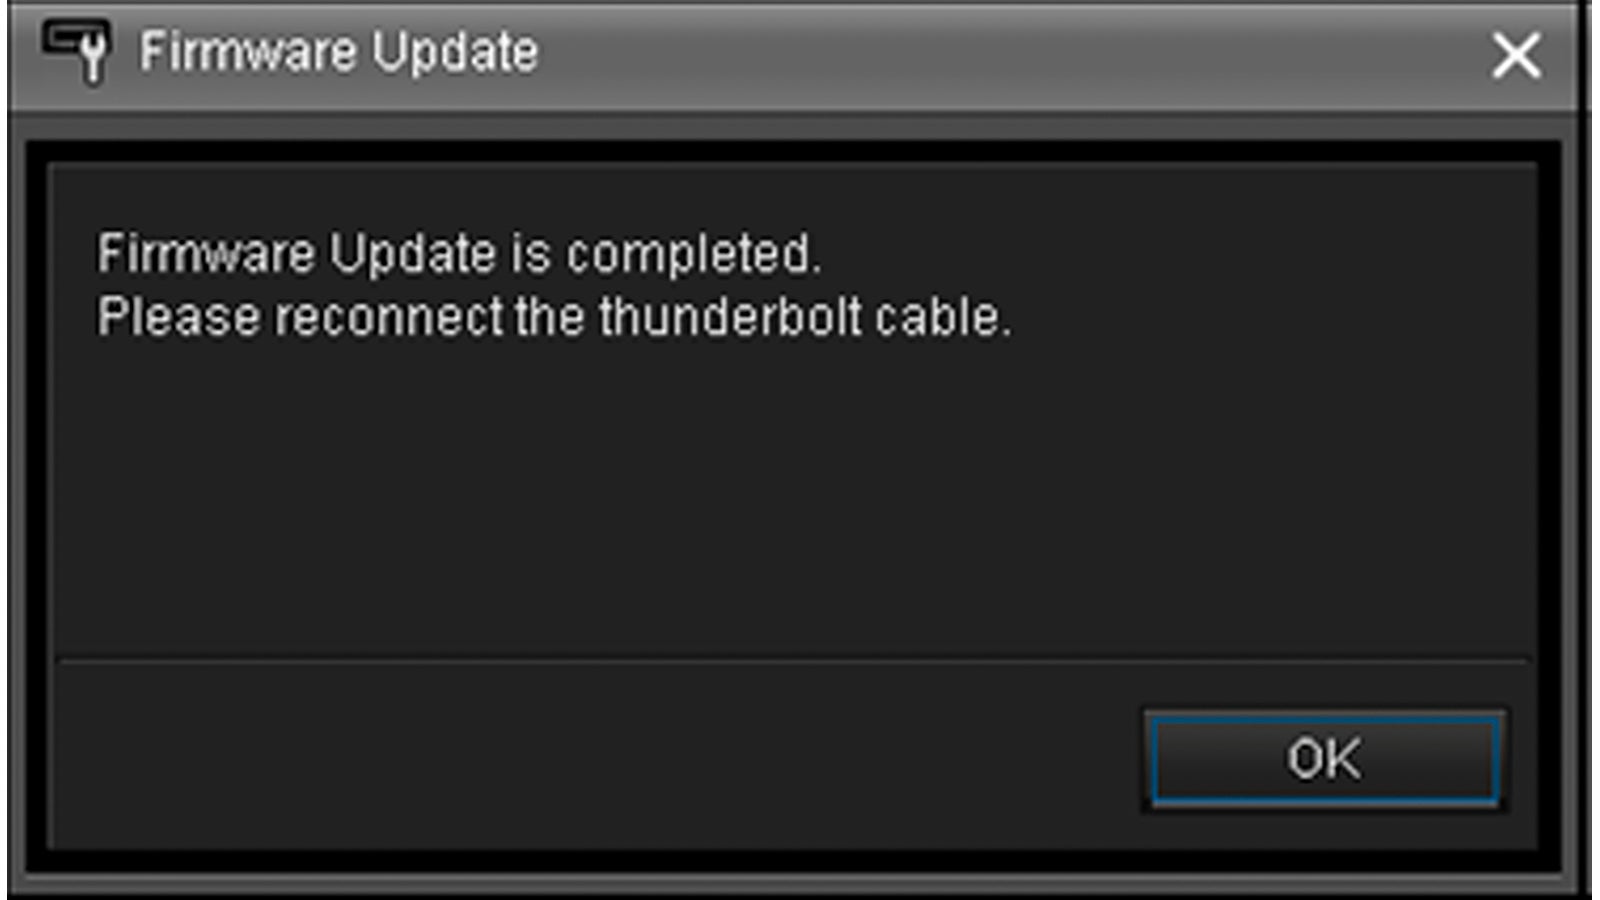
7. Upgrade process typically takes under one minute to complete.
8. After update completed remove and reconnect the TB2 cable. Confirm that the
AXS-AR1 functions correctly.
AXS-AR3 upgrade procedure
- Download AXS-AR3 upgrade file AR3_01_10_630.bin to Mac or Windows computer.
https://dmpc.cimediacloud.com/r/2rkmoWb49CoT - Connect AXS-AR3 to Mac or Windows computer using TB3 cable.
- Open AXSM Drive Utility.
- Insert AXS card into AXS-AR3.
Select AXS-AR3 and click on Firmware Update.

6. Firmware Update window will appear. Browse to location where file AR3_01_10_630.bin is located and click Update.

7. Upgrade process typically takes under one minute to complete.
8. After update completed remove and reconnect the TB3 cable. Confirm that the AXS-AR3 functions correctly.


