
06-30-2020 - Gear, Technology
Building Rialto - 3 VENICE Extension System Sample Builds
By: Ryan Campbell
Ryan Campbell has been working in film, and framing images, for 15 years. He's worked with a who’s-who of the industry on everything from commercials, features and TV, to new media and lab experiments. If you've had a shot or situation and your initial question was, “How should we...?” Ryan is potentially the one who, working modestly behind the scenes, provided the solution for your producers, directors, DPs, camera operators, underwater operators, drone operators, ACs, DITs, gaffers and key grips.
With the rise in popularity of the VENICE, he’s frequently asked “How should we build the Rialto?” These are some of the ways that Ryan answers.
For the uninitiated, let’s start at the beginning. Since its release, the Sony VENICE has proven its ability to create a fantastic image while being able to manipulate the frame size, color, and workflow to meet the needs of any project. Earlier this year the VENICE achieved another accomplishment, the 2020 SOC Technical Achievement Award for the Rialto Extension System. This extension system, simply known as Rialto, allows you to separate the sensor block from the camera body and operate it remotely via a tether back to the body itself.
Rialto was making social distancing cool before social distancing was a thing, providing 9ft of range between the lens and the body, with another 9ft extension available for a total of up to 18ft (5.5m). Rialto creates an extremely lightweight and compact setup out of an already very powerful camera, shaving significant size and weight from normal studio builds without any loss of image quality. This setup allows for an easy handheld mode, enables you to locate it into tiny spaces, keeps stabilization systems lightweight, allows use of larger lenses while maintaining a smaller profile, facilitates faster abilities for motion control rigs, use of body mounts, and several other situations that you wouldn’t expect from a full-frame cinema camera.

Here’s a fast unofficial summary of switching to Rialto mode: While the connections and ports should be respected, in the right conditions, you can convert to Rialto mode in the field. The Rialto setup typically comes in a case “Desert Wrapped” and has the body adapter screwed into the Rialto imager block adapter. Separate these, then take the screws out of the VENICE Body’s sensor block, and don’t forget the ones on the bottom of the body, nothing needs to be forced. Attach the camera body adapter of the Rialto to the VENICE body and attach the sensor block to the imager block adapter. It's that simple. For the AD questioning you, with some experience this part of the process can easily be completed in less than 5 minutes. Once you’re done with this, you can technically toss a lens on and start shooting. Buffer for more time, of course, if you’re doing an operator usable build and not just shoving it in the corner of a cockpit. The only right way to build this setup is for the shoot or shot. Hopefully, this offers a starting-off point to get you on your way.
A quick disclaimer on what initially confused me most - that the front of the Rialto sensor housing will provide whatever power is used on the camera end. This connection is a 3-pin Lemo, which is traditionally 24V. If you feed it 24V on body-side via pigtail, you’ll get 24V on Rialto-side, and likewise if you feed it 12V body-side you’ll end up with 12V Rialto-side, which is still the 3-pin Lemo. Make sure you supply the correct voltage and get the right cables for your accessories since this also enables a flag to be sent so that you have R/S over 12V. Please also be aware that the port, when pigtailed directly from the body’s front Lemo, has an amp limit. It’s wiser to power it from a power distribution source.

OG Preston Build
Tried-and-true workhorse that’s ready to run around.
Ingredients (without backups):
- 1x Sony VENICE Body w/R-7 Raw Recorder
- 1x Sony VENICE Extension System (Rialto)
- 1x Modified Keslow Cheeseplate for Rialto (or other)
- 1x 15mm (or 19mm) Rod Block or Rod Starter
- 1x AB Battery
- 1x Lens of Choice
- 1x Preston Hand Unit
- 1x Preston MDR-3 (or MDR-4)
- 2x Preston Motors of choice
- 1x Cinetape Kit
- 3x Extra Long Motor Cables
- 1x Extra Long Cinetape Sensor Cable
- 1x TV-Logic 058W (some show had all of the F-5A and F-7H when built for photo)
- 1x 12-14V 3-Pin (not a typo) to mini-XLR power cable
- 1x Ultralight 3/8” to 1/4" (Articulating Arm of Choice for your monitor)
- 2x 3/8” Rosette Starters
- 2x Rosette Handles
- 2x Rosette Handle extensions (I only used one)
- 1x Top Handle for Rialto
- 1x Teradek HD-SDI Transmitter (TX)
- 1x ARRI LMB
- 1x Backpack w/dovetail
Step 1: Configure for Rialto Mode.
Step 2: Pigtail power voltage of choice from body distribution into Rialto connection body-side.
Step 3: Attach and cable/power MDR, Video TX, and Cinetape Display (brain) to the body-side.
Step 4: Run and possibly loom motor cables and long Cinetape sensor cable to Rialto cable, all the way to the end.
Step 5: Attach Rod Starter or Rod Block to the Rialto-side with rods and motors, attach motor cables.
Step 6: Attach top handle, rosette and handles to operator preference.
Step 7: Attach and cable Cinetape sensor however you like, I love the versatility and ease of attaching it via a CameoGear Swivel Mount
Step 7: Attach TV-Logic 058W and articulating arm of choice, power monitor via 3-pin port on the front of Rialto-side
Description:
Remote mounting the MDR, video TX, and the range finder brain is not new and is actually the choice of several top DPs and operators so they don’t have all of the accessories adding weight and crowding their camera operator’s freedom. The operator has a camera, lens, and an on-board monitor. Assistants and DITs still have control of the camera. Body-side, feel free to toss on a LUT box of choice and camera control such as the Ultimote RCU. The backpack in this situation is optional but provides maximum mobility. The backpack can be worn by the operator, however, it does increase the dimensions of their footprint. Preferably, there’s a trustworthy crewmember who’ll be tasked with wearing the backpack, wrangling the tether, and that will take the camera from the operator between shots to save the operator’s strength.

Sony Rialto ARRI Style
ARRI makes a lot of great accessories for a variety of cameras, including for the VENICE and Rialto. It’s the same setup as above but instead use:
- 1x ARRI WCU-4
- 1x ARRI UMC-4
- 2x ARRI CLM Motors of choice
- ARRI Plate Set for VENICE (not pictured)
- ARRI VENICE Extension Kit (not pictured)
- Keslow custom handle extension w/power distribution
- 2nd AC is asking if he can have his SmallHD 702 Bright on the order
Step 1: Configure for Rialto Mode.
Step 2: Attach ARRI Plate Set and Extension kit to the body-side and Rialto-side.
Step 3: Attach top handle with power distribution extension.
Step 4: Pigtail power voltage of choice from body distribution into Rialto connection, body-side, and pigtail Rialto-side into handle’s power distribution.
Step 5: Attach and cable/power Video TX, and Cinetape Display (brain) to the body-side.
Step 6: Run long Cinetape sensor cable to Rialto cable, all the way to the end.
Step 7: Mount UMC-4 to Rialto-Side, attach rods, motors, power, and motor cables, power via handle.
Step 8: Attach rosette handles to operator preference on Rialto-side.
Step 9: Attach and cable Cinetape sensor however you like.
Step 10: Attach SmallHD 702 Bright and articulating arm of choice, power monitor via handle.
Description:
I’ve yet to see a rental house or owner naturally carry long CLM motor cables, and let’s say you didn’t pay the extra cost to have them made (if possible, with potential line loss). That’s okay, just mount the UMC-4 Rialto-side and move on. This build still remains weight friendly and will be fairly unobtrusive to the operator, it just introduces a few more cables on Rialto side.

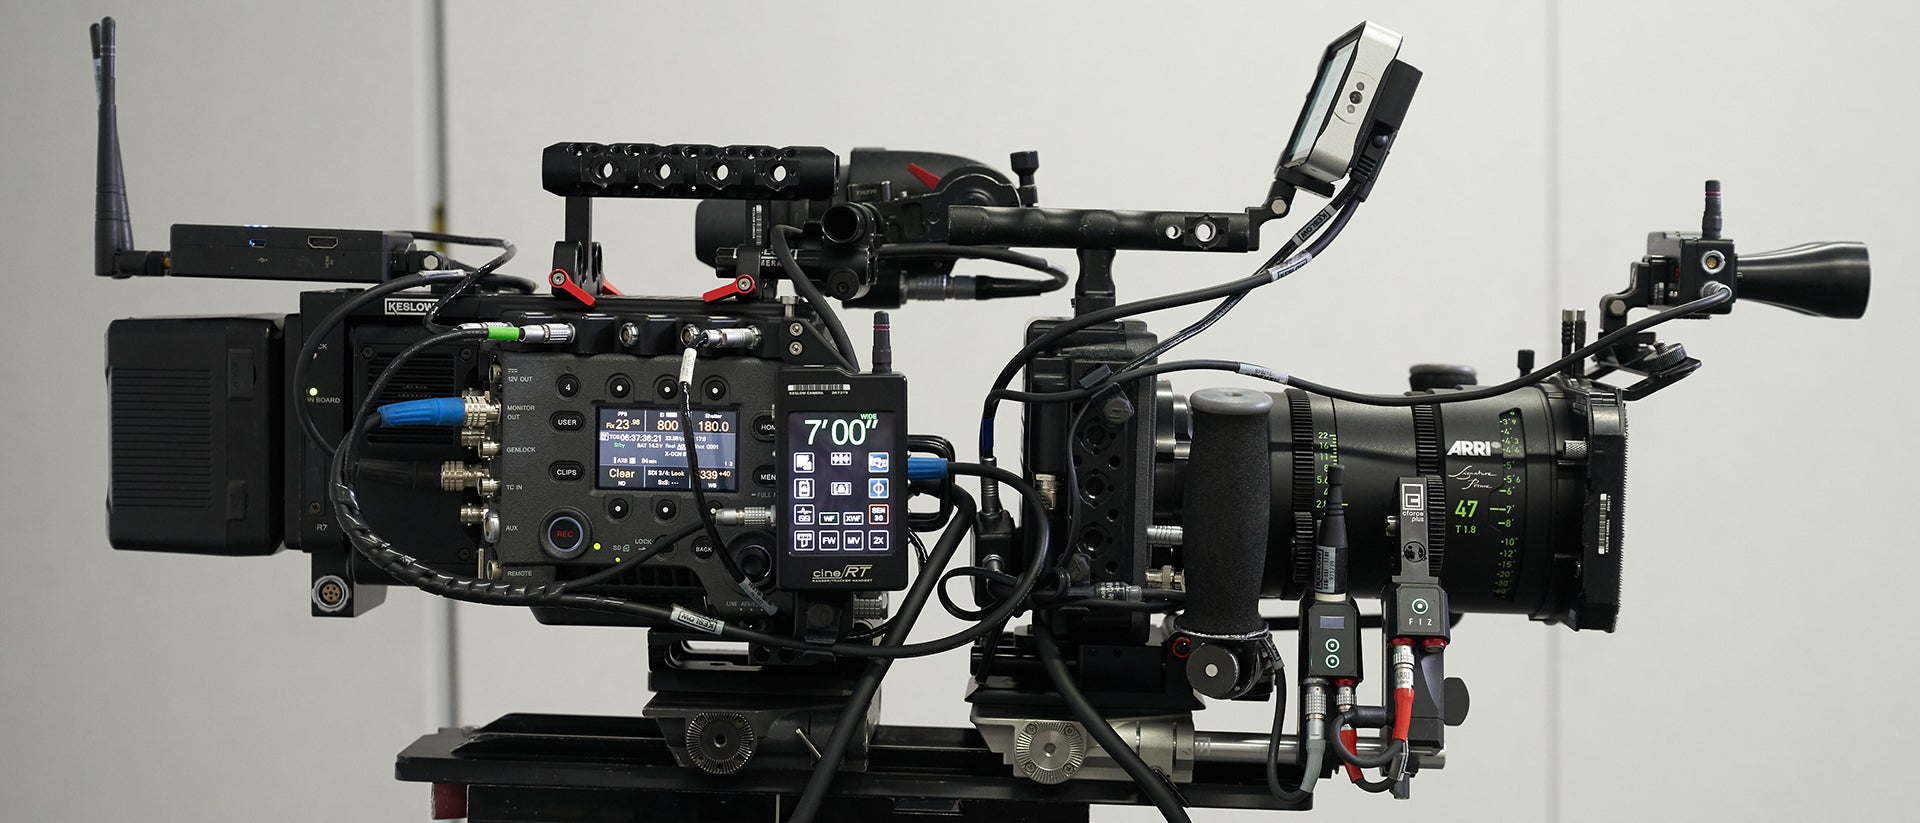
Studio and Back Again
A personal favorite for weight and efficiency.
Ingredients (without backups):
- 1x Sony VENICE Body with Keslow Power Distribution and R-7 Raw Recorder
- 1x Sony VENICE Extension system (Rialto)
- 1x Modified Keslow Cheeseplate for Rialto (or other)
- 2x ARRI BP-8 (19mm) or BP-9 (15mm)
- 1x 18” Dovetail (remove safety screw)
- 1x O’Conner 2575
- 1x Mitchell Sticks
- 1x Rolling Spreaders
- 1x Gold Mount Battery
- 1x Block Battery
- 1x Lens of Choice
- 1x ARRI WCU-4
- 1x ARRI Cforce Mini RF
- 1x ARRI Cforce Plus
- 1x Focusbug CineRT kit
- 1x SmallHD 502 Bright
- 1x 3-pin to 2-pin break out box
- 1x Articulating Arm of Choice
- 2x Rosette Handles
- 2x Rosette Handle extension
- 1x Top Handle for Rialto
- 1x Teradek HD-SDI Transmitter (TX)
- 1x ARRI LMB without shade
- 1x ARRI LMB accessory mount
Step 1: Configure for Rialto Mode.
Step 2: Build head with dovetail, sticks, spreader, and strap a block battery to the spreaders.
Step 3: Attach BP-8/BP-9 to VENICE body side and also to Rialto side.
Step 4: Slide VENICE body to the back of the dovetail, slide Rialto-side to front.
Step 5: Attach Gold Mount battery to VENICE body, cable block battery to distro plate.
Step 6: Attach and cable/power Video TX and CineRT Display (brain) to the body-side.
Step 7: Attach breakout box to Rialto-Side.
Step 8: Attach CineRT sensor and power via breakout box.
Step 9: Attach SmallHD 502 Bright and articulating arm of choice, power monitor via breakout box.
Step 10: Attach rods on the Rialto-side. Use Cforce mini RF for iris and power it via breakout box. Use Cforce plus for the focus and daisy chain it through the Cforce mini RF.
Step 11: Attach rosette handles to operator preference on Rialto-side. Make sure they do not interfere with sliding onto the dovetail.

My rationale for this setup is less Rialto weight and fewer cables combined with the ease and flexibility of going handheld one minute and then going back on sticks the next. This build is for more of a studio/interior situation. The CineRT’s wireless range finder integration means less on your build, and while the menus are far less than intuitive, it has proven itself as an awesome tool and reliable on set. The Cforce Mini RF and WCU-4 combo does have limitations, but the tradeoff means we can ditch those giant motor brains for a cleaner and efficient build.
You’ll notice that most of these builds are featuring handheld camera skate-style or Rugby ball mode. If you need the sensor block at eye-level, it’s very easy to build a counterweighted shoulder/stock type mount. For solutions on the vest, there are options such as adapters for Klassen Slingshot, Orca Rigalto, and Easyrig’s Cinema 3 and Vario 5 have cheeseplate options for mounting the VENICE to the back of the vest.
If you’re mounting the Rialto or using it in some other way, especially for the first time, I hope this article gives you a stepping stone and instills a bit of confidence. With so many different vendors, brands, and situations, the combination of possibilities of how we can build out the VENICE is countless. I’ve found builds such as these three to be the most efficient in general. Find what works best for you and your shoot.
Many thanks to Brad Wilson and Nick Lanata of Keslow Camera for their help in the production of this article.


