02-08-2021 - Gear, Technology
FX9 and FX6 White Balance Functions
By: Alister Chapman
Alister Chapman is a DP, editor, producer, educator, and is very well versed in technology and all things camera and video related.
To learn more about Alister Chapman, visit his website: xdcam-user.com.
Alister’s recent article Painting the FX6’s Output in Custom Mode Using LUTs
FX6 can be found at this link: https://sonycine.com/articles/painting-the-fx6-s-output-in-custom-mode-using-luts/
FX9 and FX6 White Balance functions
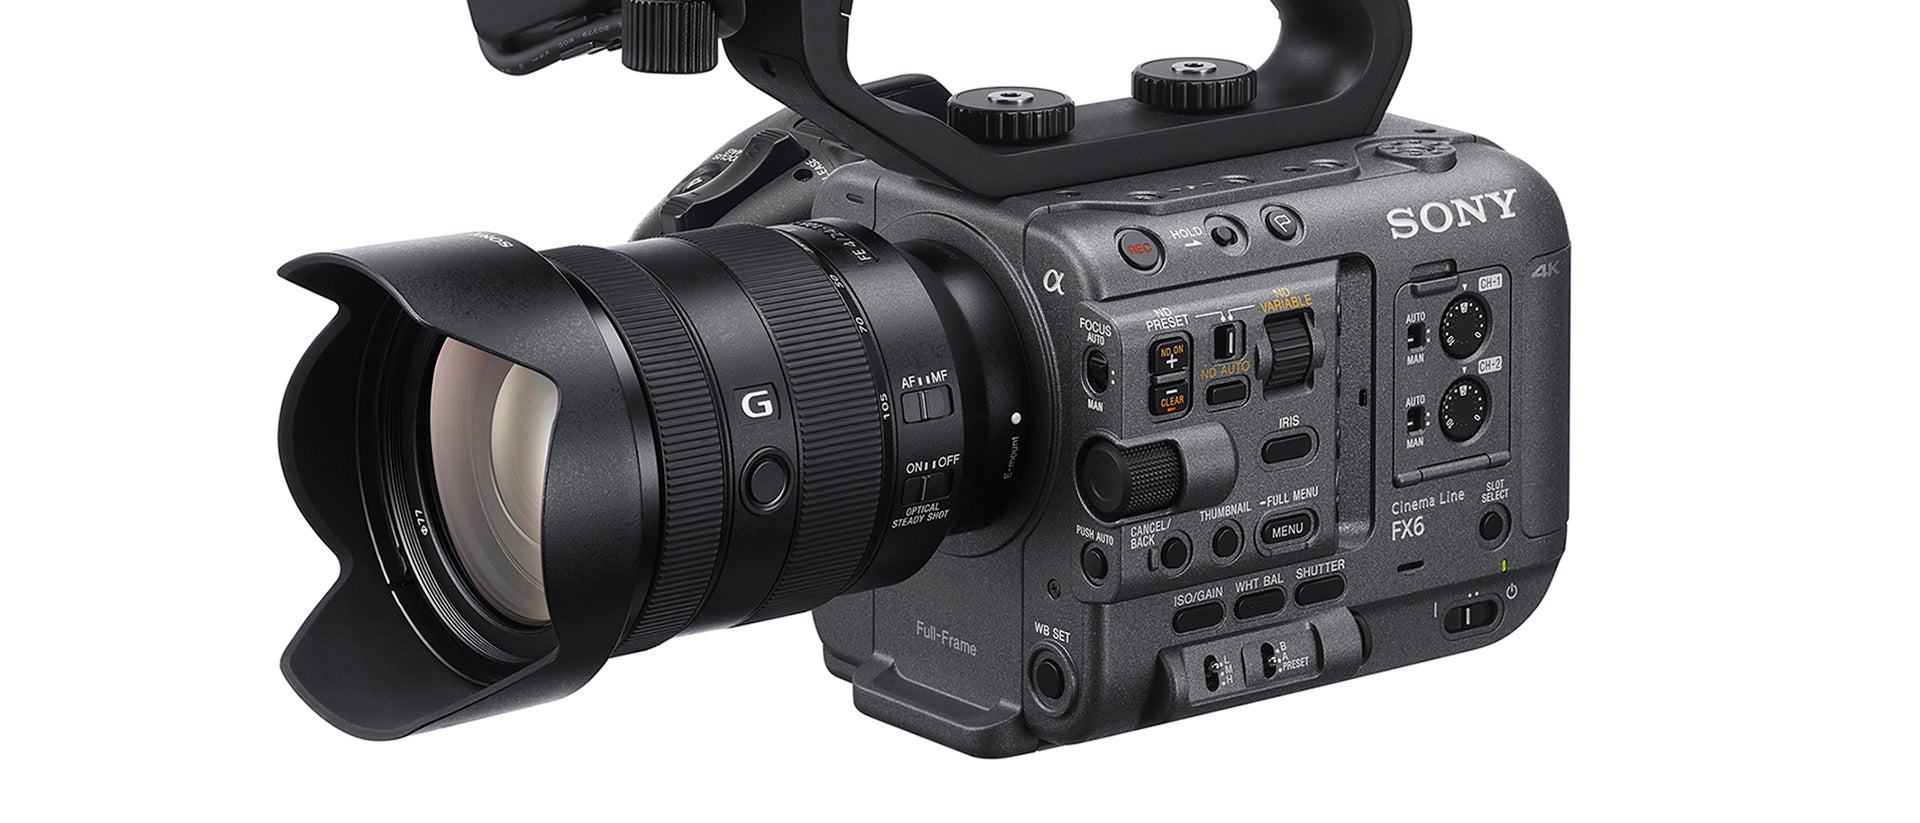
The FX9 and FX6 camcorders introduced some improvements and changes to the included white balance functions compared to previous generations of similar camcorders.
One of the key changes introduced is the ability to change the color temperature to whatever you want in the dedicated S-Log3 shooting mode called CineEI. Previous generations of cameras were limited to 3 preset white balance settings, but that restriction is not present in the FX9 and FX6.
Another change is the addition of an independent tint control. A positive tint value will make the images warmer with less green while a negative value will make the images cooler with more green.
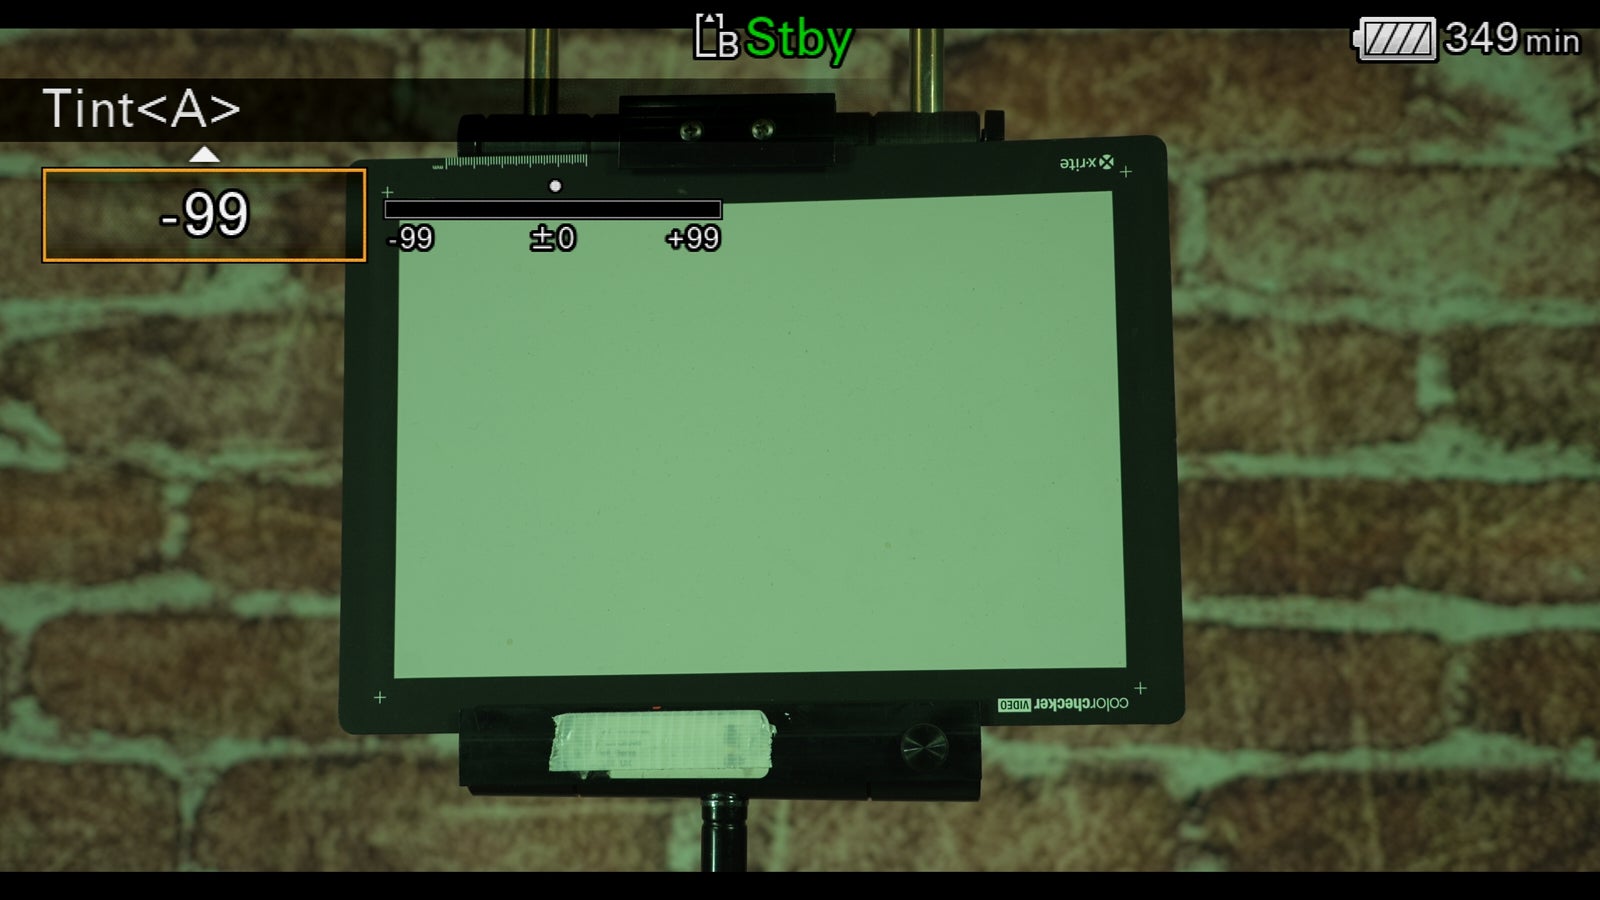
Image above: Tint at -99, image is tinted towards green/blue
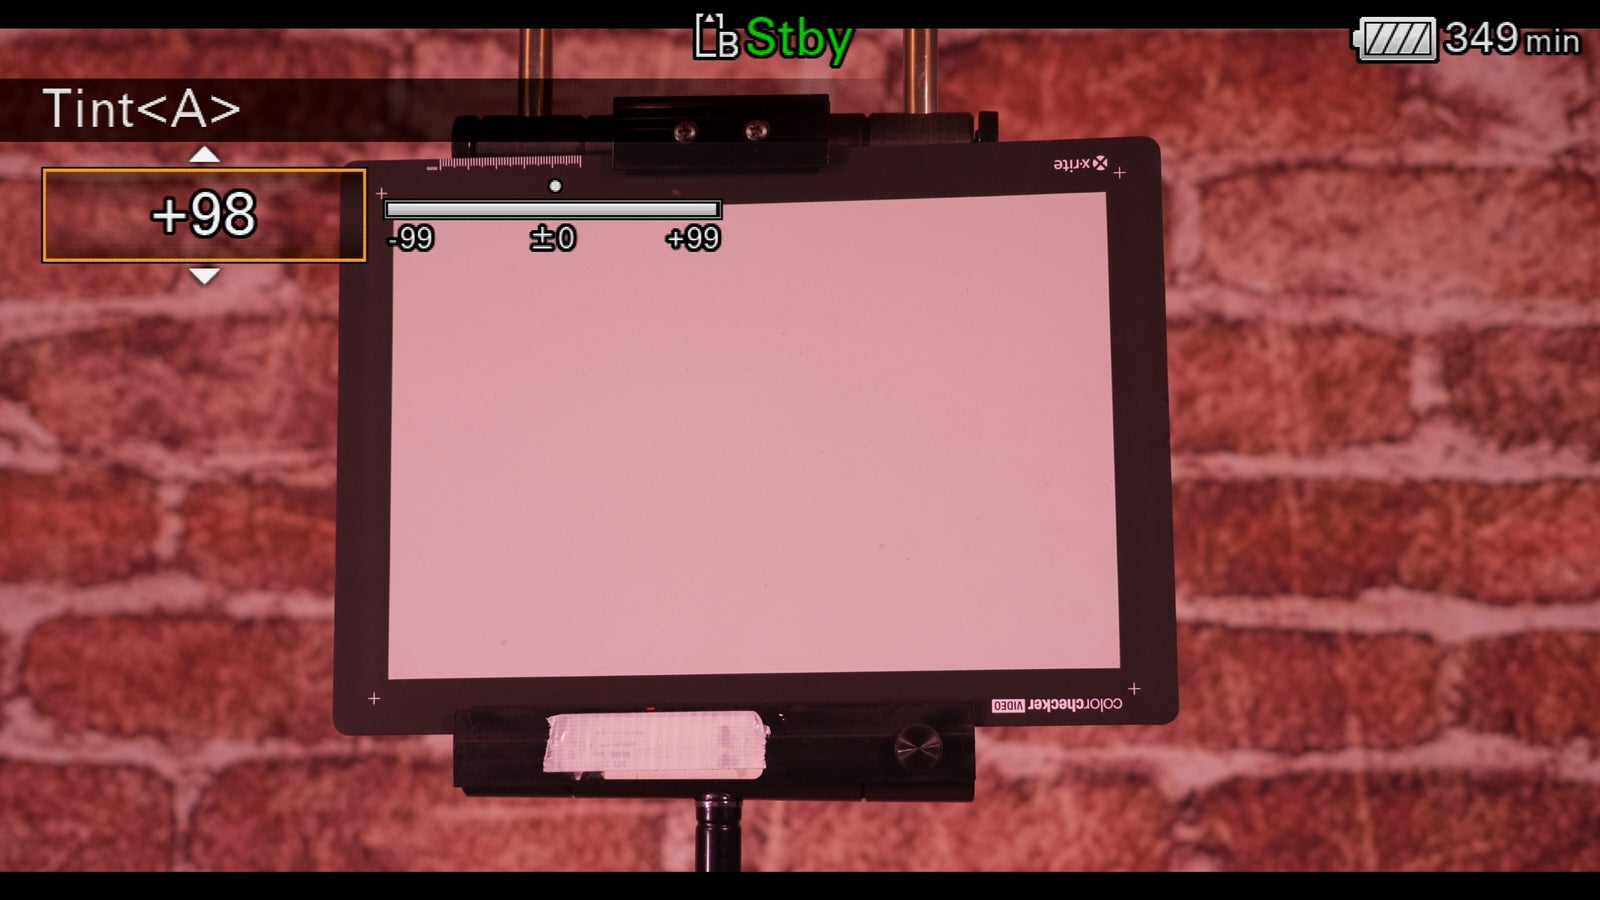
Image above: Tint set to +99, image is tinted warm and less green
There are many ways to set the white balance. You can use presets, dial in your own white balance and tint, use “WB Set” (push auto) to white balance with a white card, or set the camera to continuously check and adjust the white balance via ATW. In addition, you can set up offsets to the white balance. It’s a very powerful and flexible system.
Preset White
When the three-way white balance switch is set to the PRESET position the camera will use a preset white balance. The preset white balance value can be changed in the menu under “Shooting – White – Preset White.” To change the preset color temperature without going into the menu, while the white balance switch is set to the preset position, simply briefly pressing the WHT BAL button will quickly dial in a preset color temperature from 2000K to 15000K. If you press and hold the WHT BAL function button on the side of the camera you can choose between ATW, the previously set preset, as well as a further 4 presets using the multi function dial or thumbstick on the hand grip.
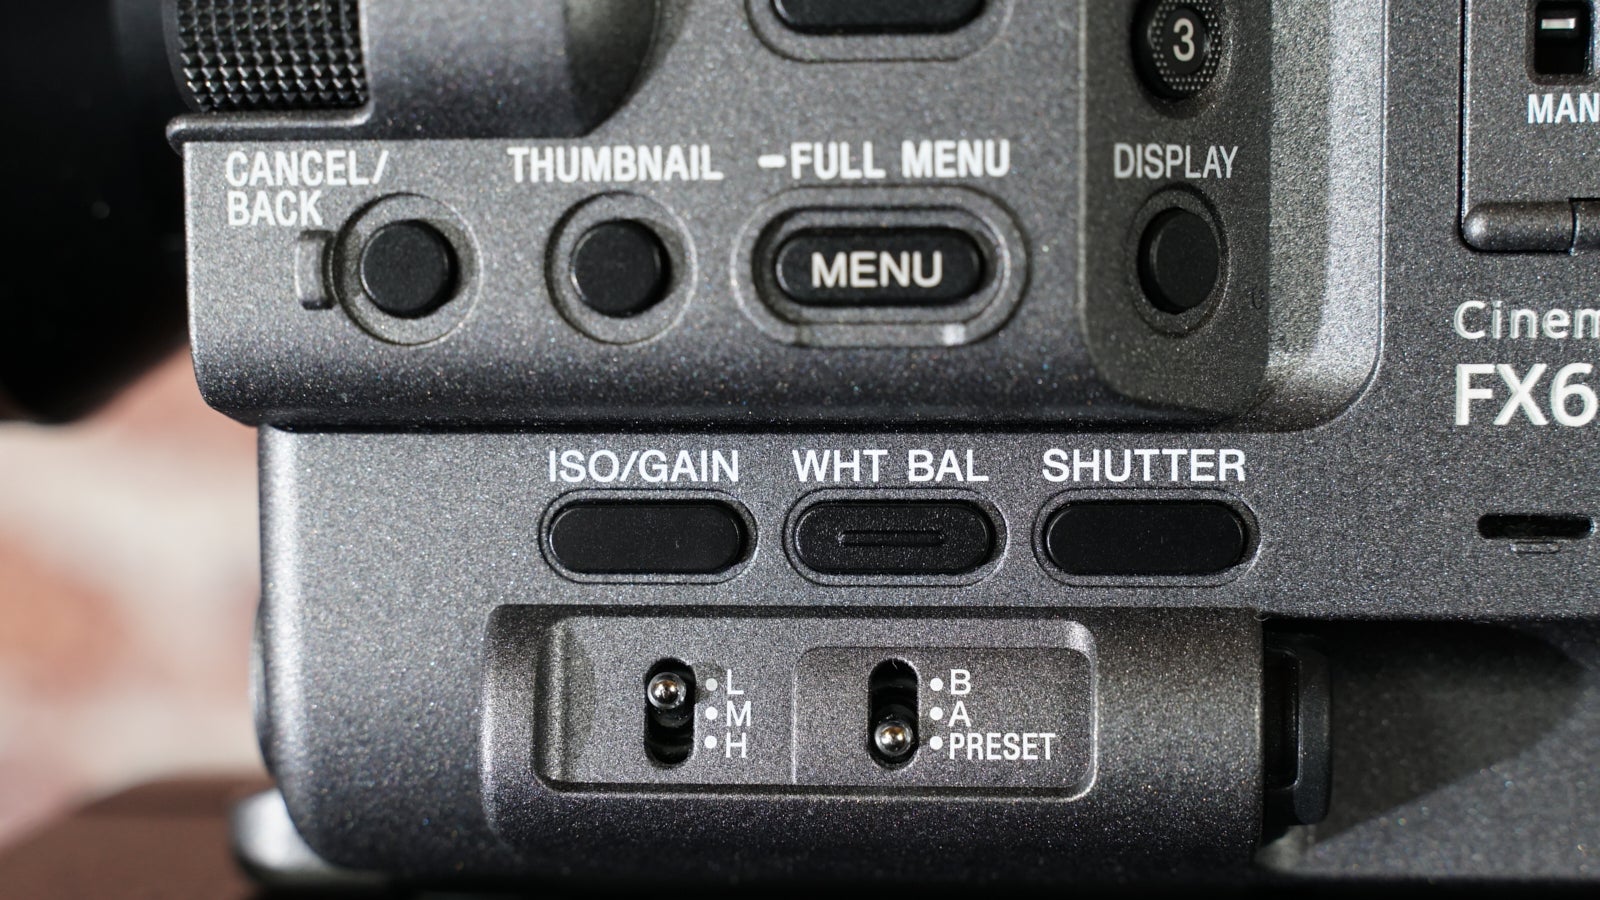
Image above: White balance switch is set to preset. The WHT BAL button is just above it and features a raised center to make finding it by feel easier
WB SET or Push Auto White
When the white balance switch is set to the A or B position, you can use the “WB SET” function in combination with a white card to set the white balance to match the lighting conditions under which you are shooting. While it is possible to use an ordinary white piece of paper, I strongly recommend that a proper white balance card is used.
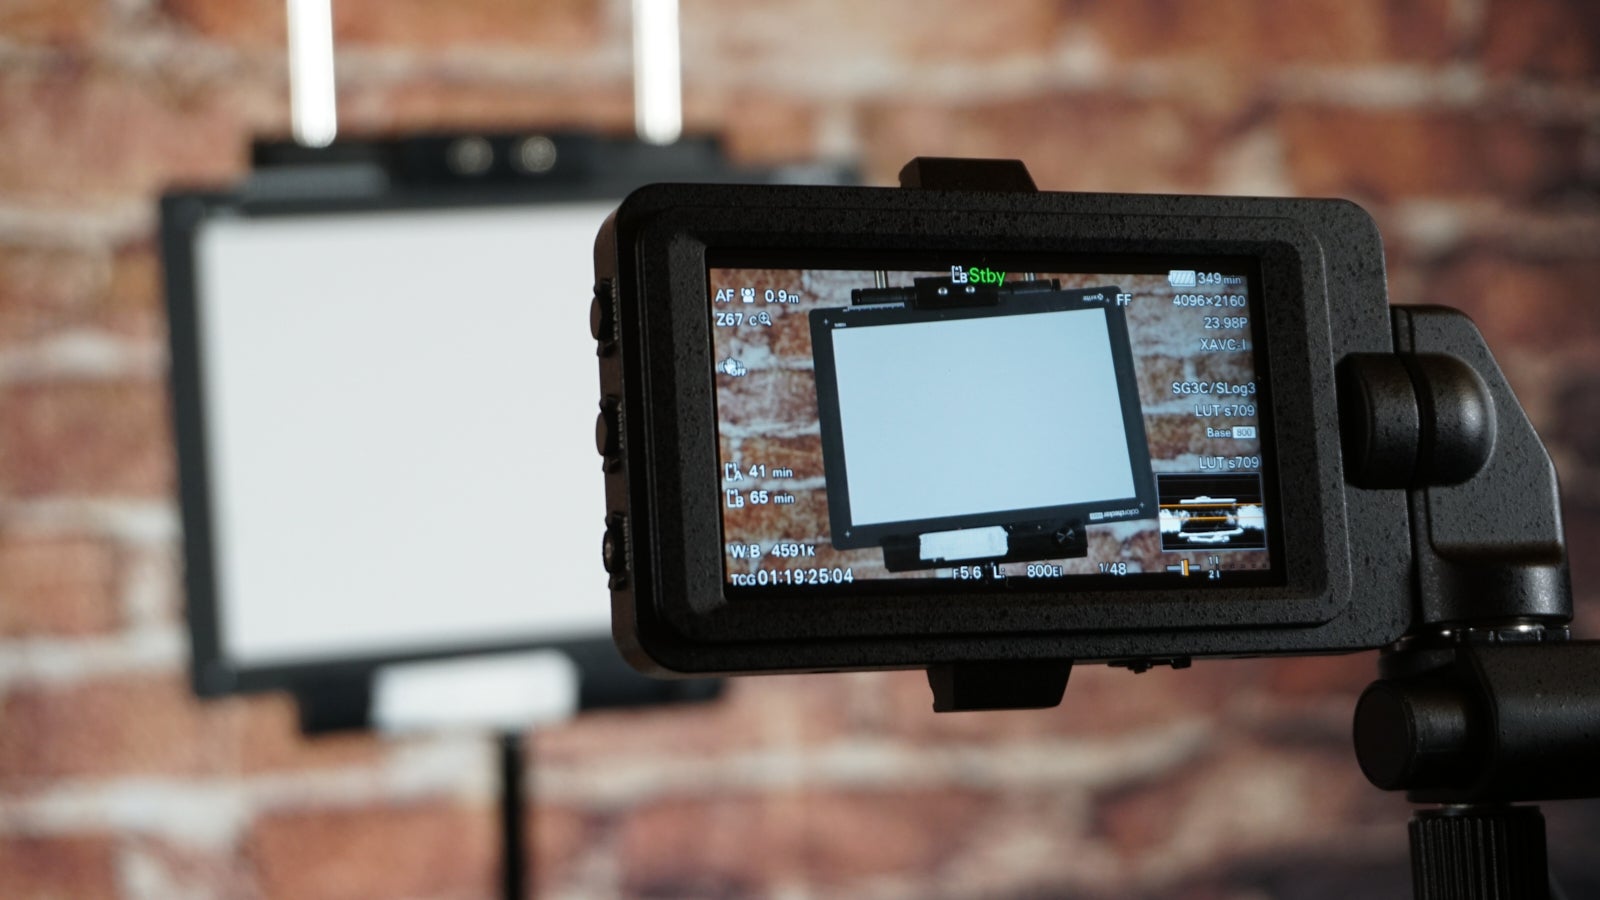
Image above, using a white card to set the white balance
A lot of normal printer or copier paper is tinted very slightly blue to make it appear brighter. This slight blue tint of the paper can introduce a very slight tint into your white balance. The white card should be placed so it is within the scene you are shooting and it needs to fill at least the center 50% of the frame. Then simply press the WB SET button on the front of the camera to set the white balance.
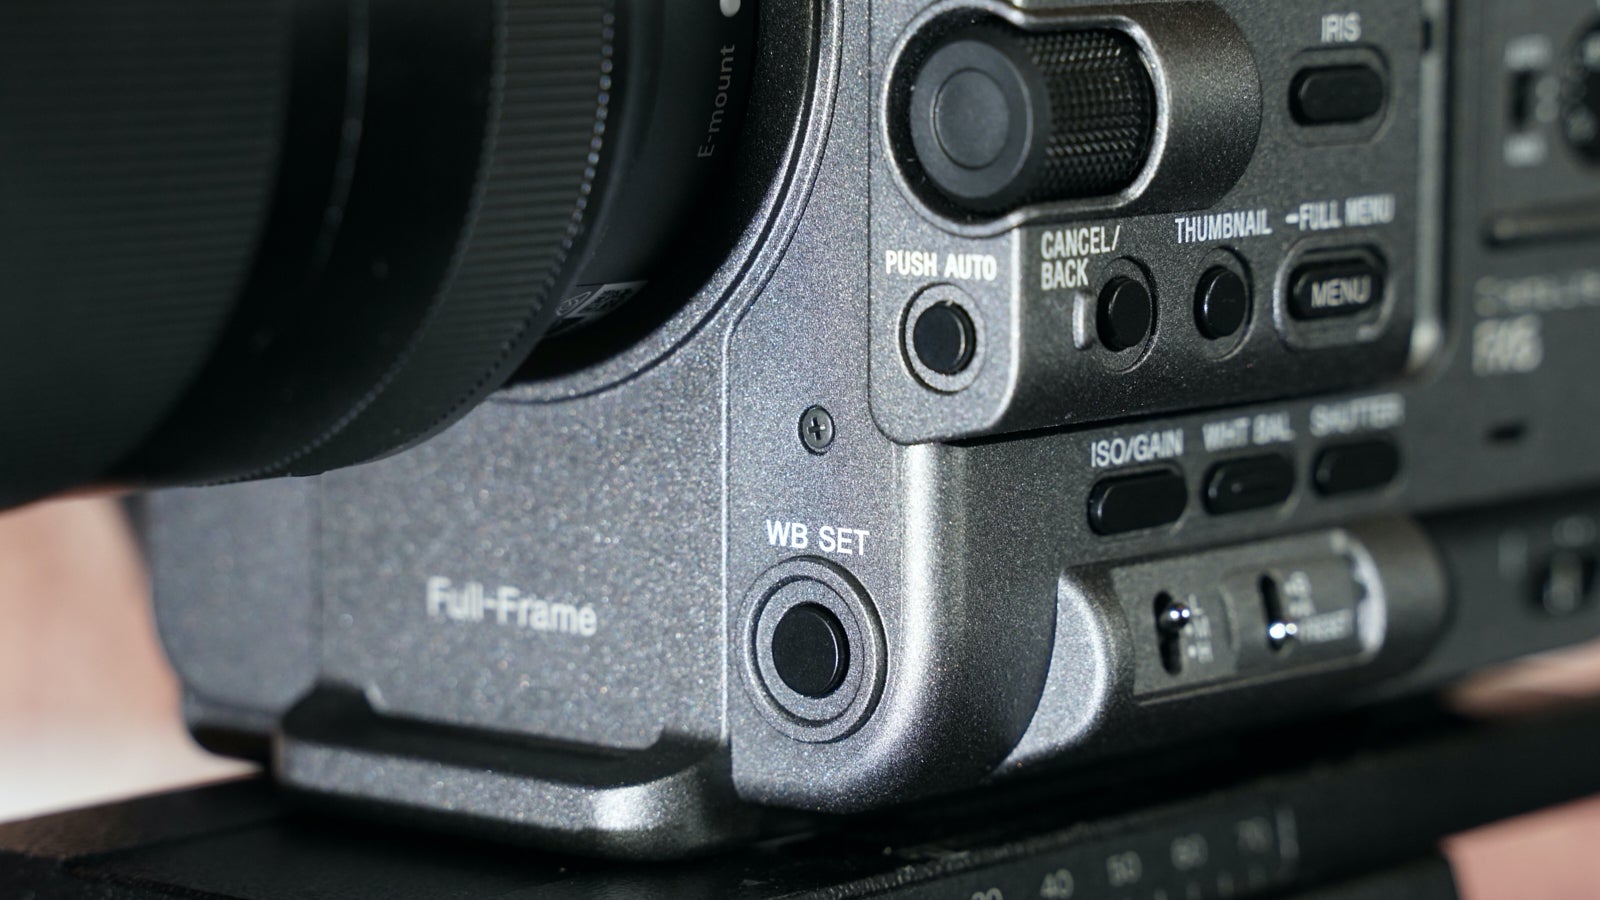
WB SET button is at lower front left of the FX6 and FX9. Don't confuse with the Push Auto button, used to automatically set the aperture/iris
When setting the white balance this way, both the white balance and tint will be adjusted to achieve a neutral white balance. The detected WB color temperature will be indicated in the viewfinder as well as in the menu.
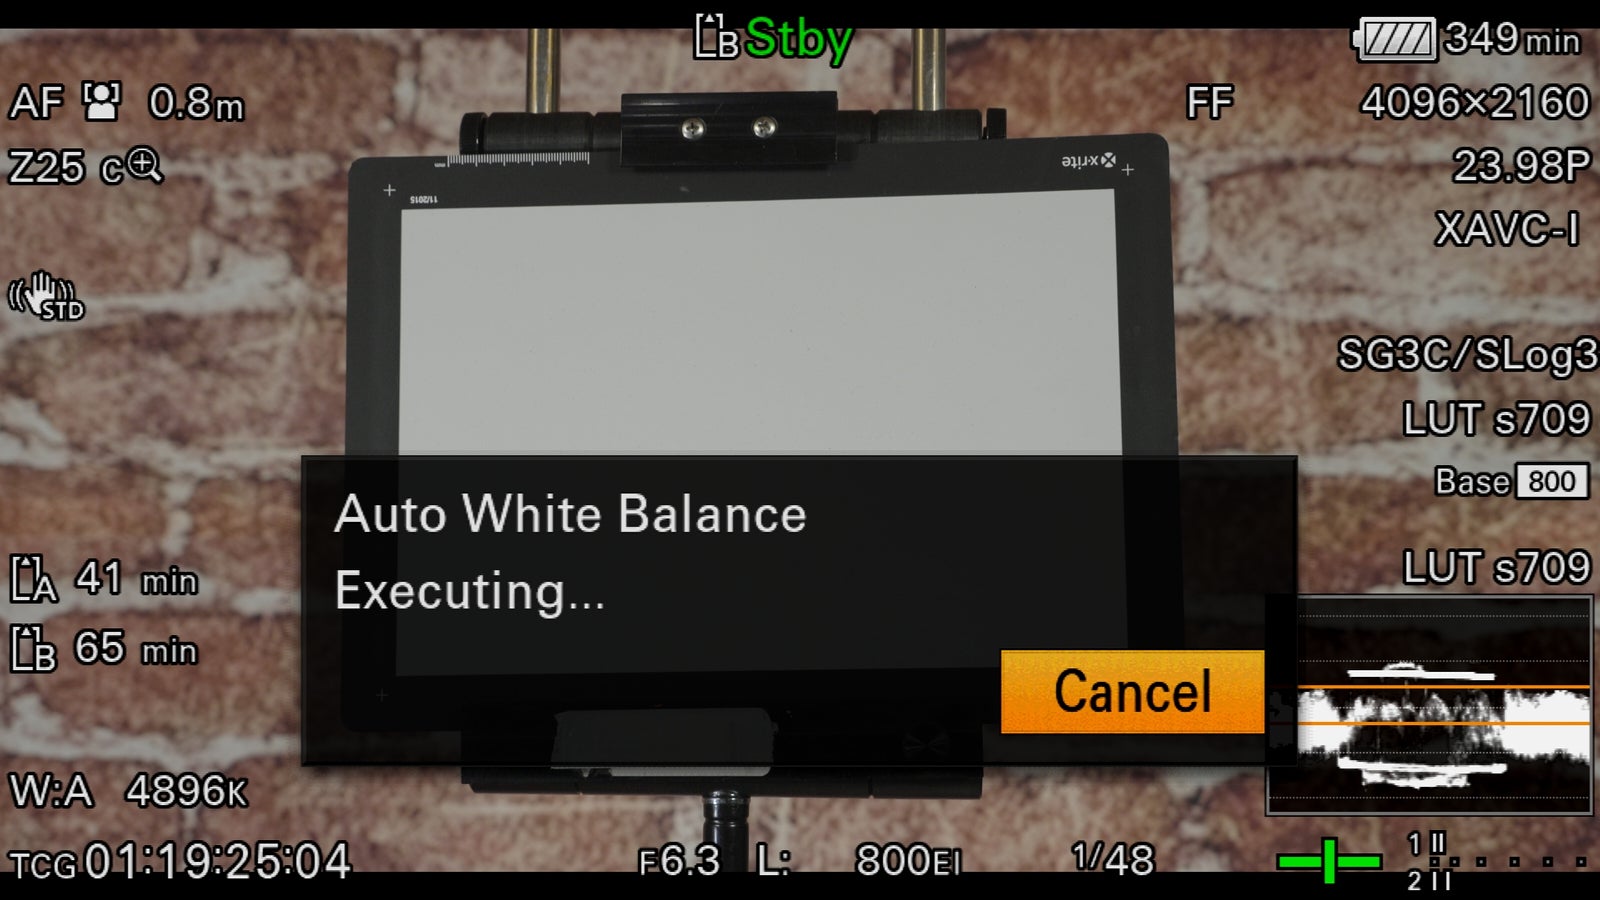
Image above: Auto White Balance (WB-Set) executing
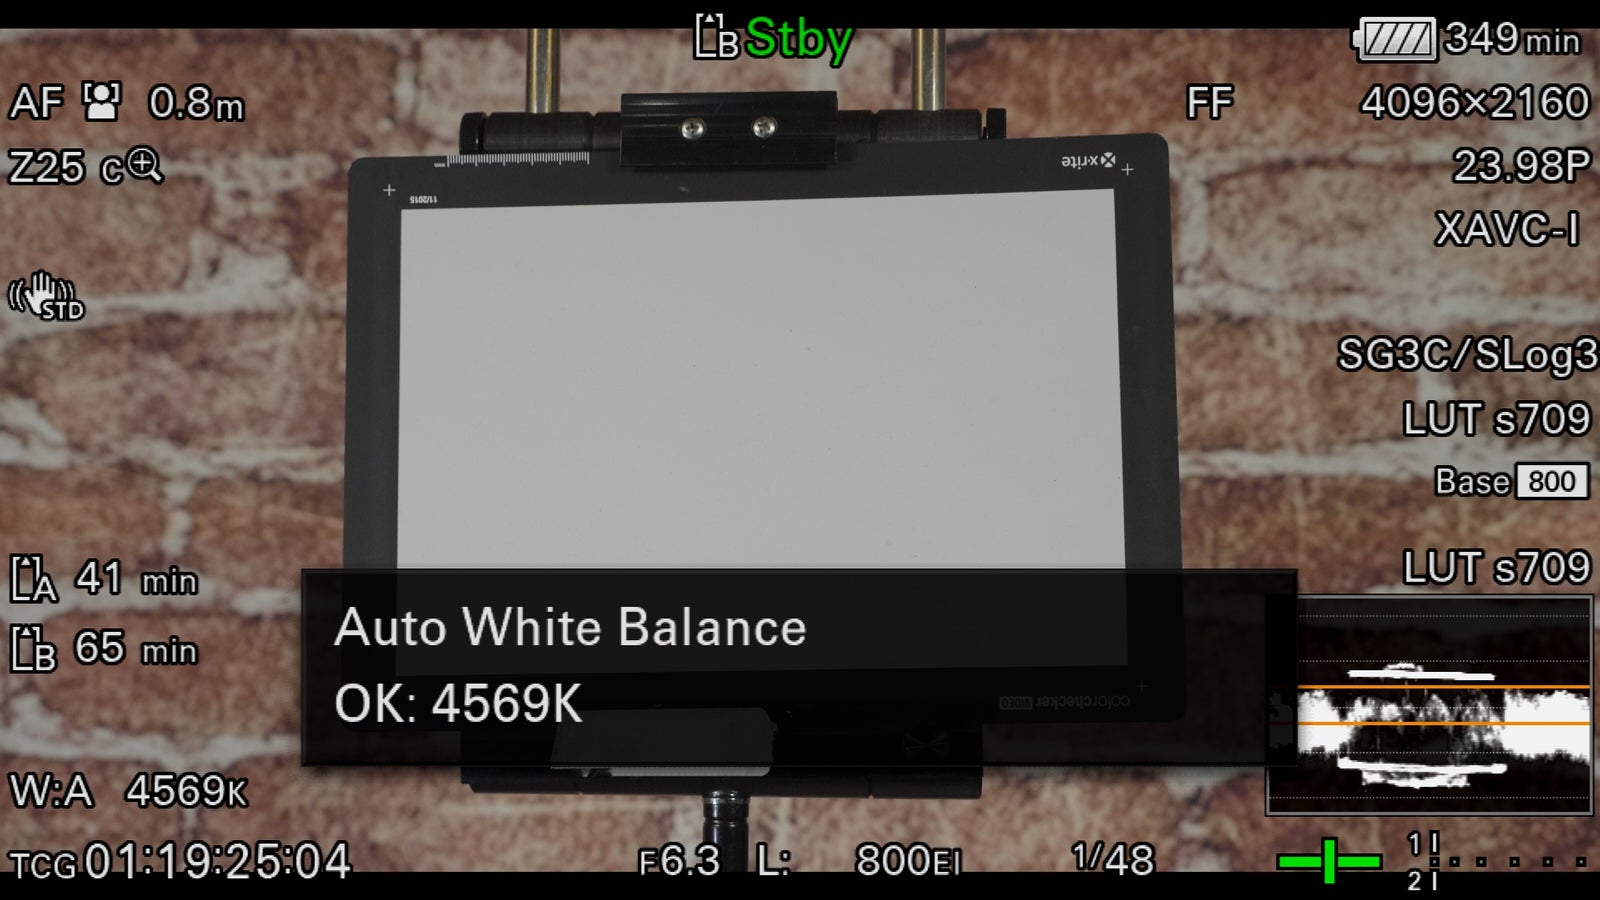
Image Above: Auto White Balance is correctly detected and the color temperature indicated
Note: while a guide white balance value is shown, I do not recommend copying this value manually to another camera. Due to small calibration differences between cameras the same numerical value may result in very slightly different results in different cameras.
Changing the White Balance.
In addition to using the WB SET function you can also manually dial in the white balance and tint that you desire for both the A and B switch positions. Simply place the switch in either the A or B position and then briefly press the WHT BAL button. The W:A or W:B value will be highlighted and you can then use the multi function dial to change the white balance.
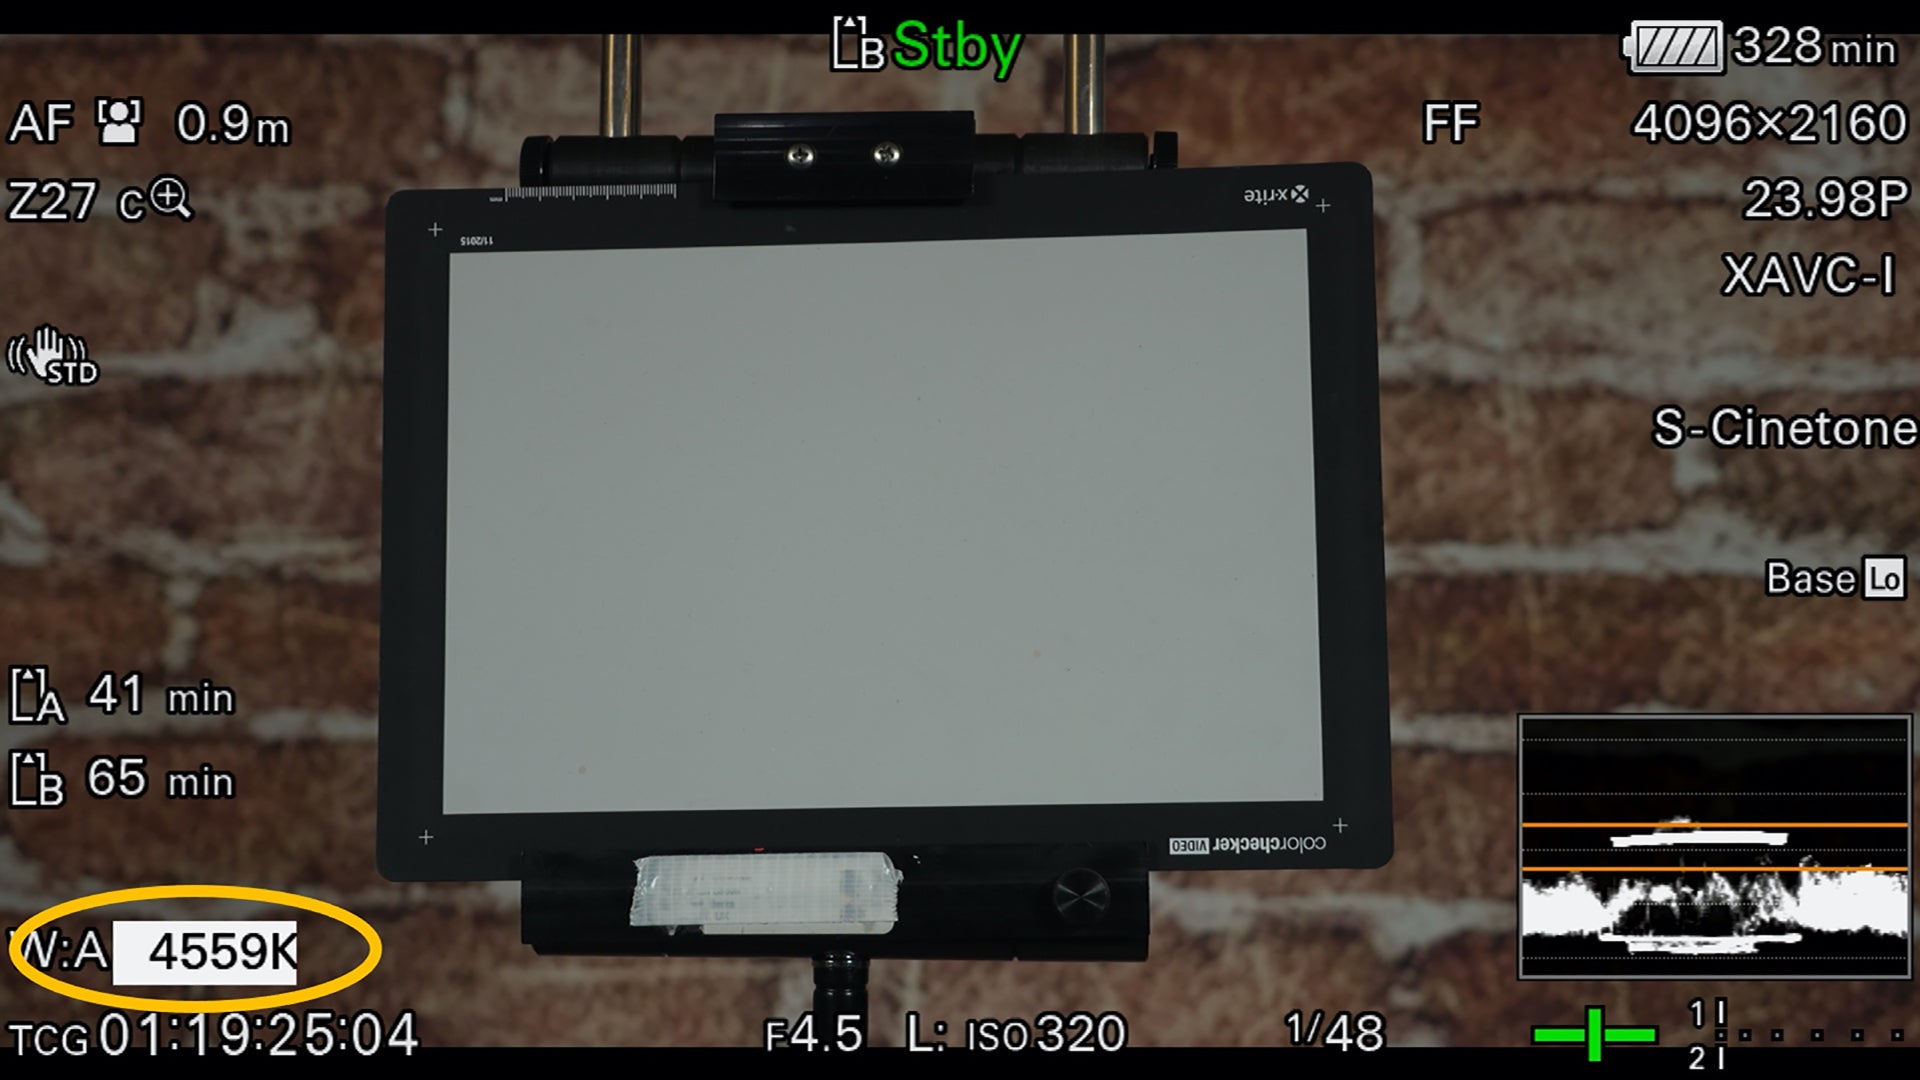
The white balance and tint can be adjusted in the main camera menu under “Shooting – White – Color Temp <A> and Tint <A>” etc.
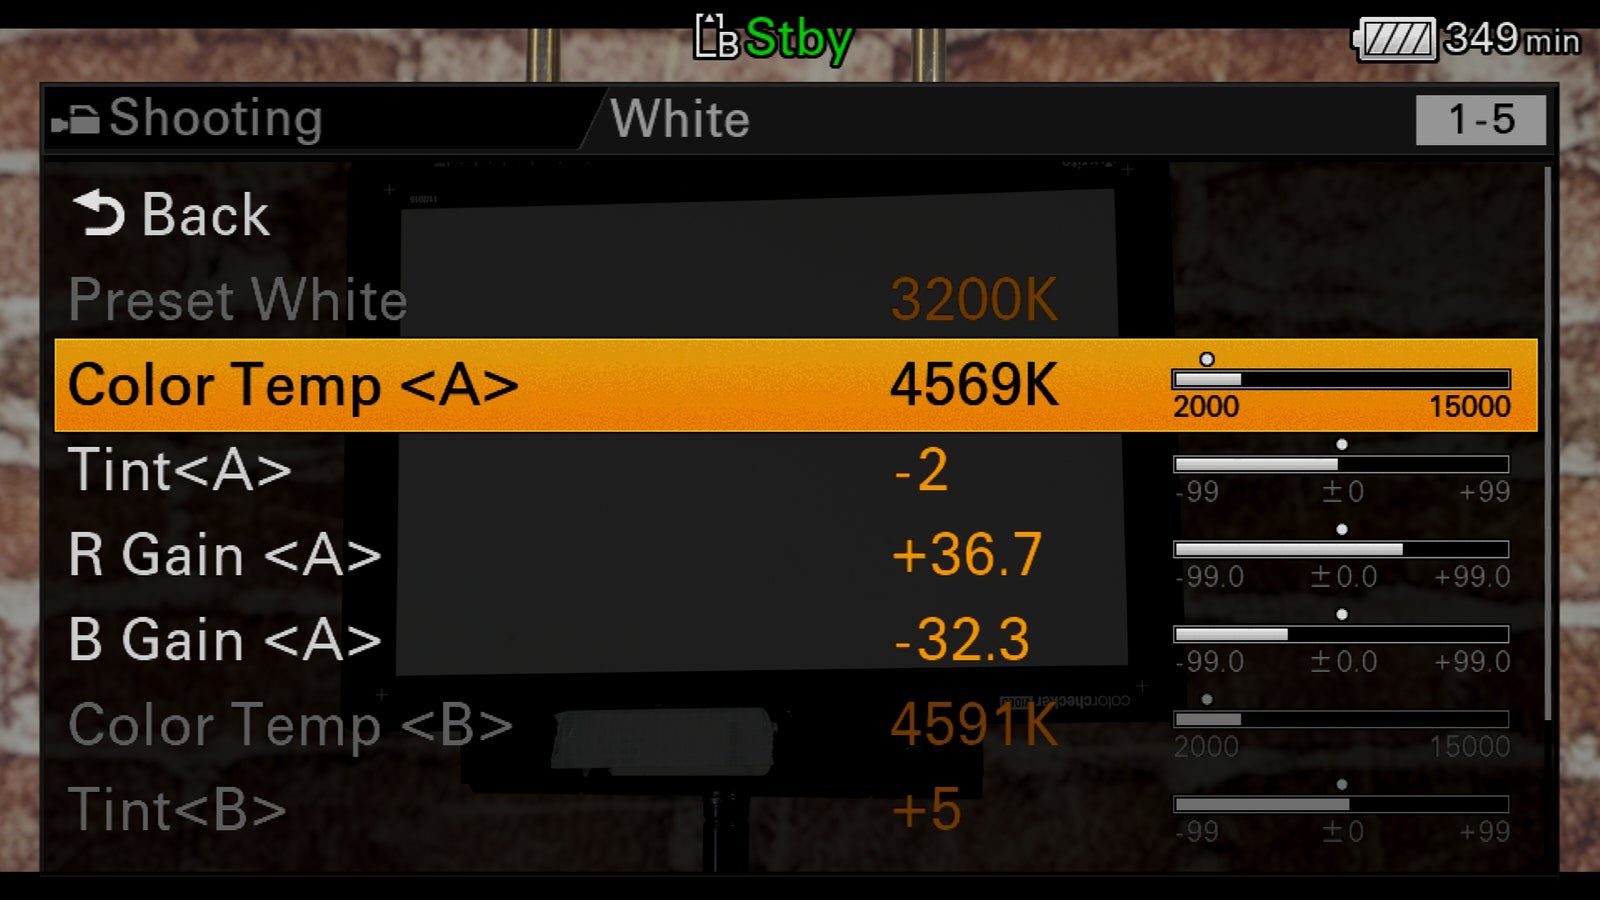
When manually setting a new Color Temp value in the A and B switch positions, you will find that the size of the Color Temp steps becomes larger when you go above 6000K. Below 6000K the steps are 20K, but above 6000K the steps become larger and larger. This is because we perceive color temperature logarithmically. At the warm end of the spectrum, we will notice small changes much more distinctly than changes made at the blue/cool end of the spectrum. The step size increase means that each step will provide a more perceptually similar change to the color of the image.
R Gain and B Gain
Below these settings you will also see settings for the R Gain and B Gain. If you change the Color Temp or Tint value, or if you use WB SET these values will change to reflect the gain of the red and blue channels needed to achieve the set white balance. It is perfectly normal to see different values here depending on how the white balance is set. The only time these values will ever be zero is when the Color Temp is set to exactly 3200K and the Tint set to 0. If you want you can manually adjust these values, but personally I prefer to leave them alone and instead just use the Color Temp and Tint controls.
If you have used WB SET to set the A or B white balance, then you may find that when you want to manually set the Color Temp to 5000K, you might only be able to select 5007K or 4987K (or similar). This can occur because the WB SET function operates in finer increments than the smallest 20K steps available when manually changing the Color Temp. In practice an offset smaller than 20K will almost never be visible, so I would not worry about this, just select the nearest value. However, if you do wish to have a nice round number, if you dial the Color Temp all the way down to 2000K it will return to exactly 2000K and you can then go back to exactly 5000K (or your desired value) from there.
ATW
The Auto Tracking White balance function, when enabled operates continuously to provide a correct looking image under varying color temperatures. ATW is not available when the camera is in the CineEI mode. You can enable the ATW function regardless of the position of the white balance switch by pressing and holding the WHT BAL button until the selection option appears in the viewfinder.
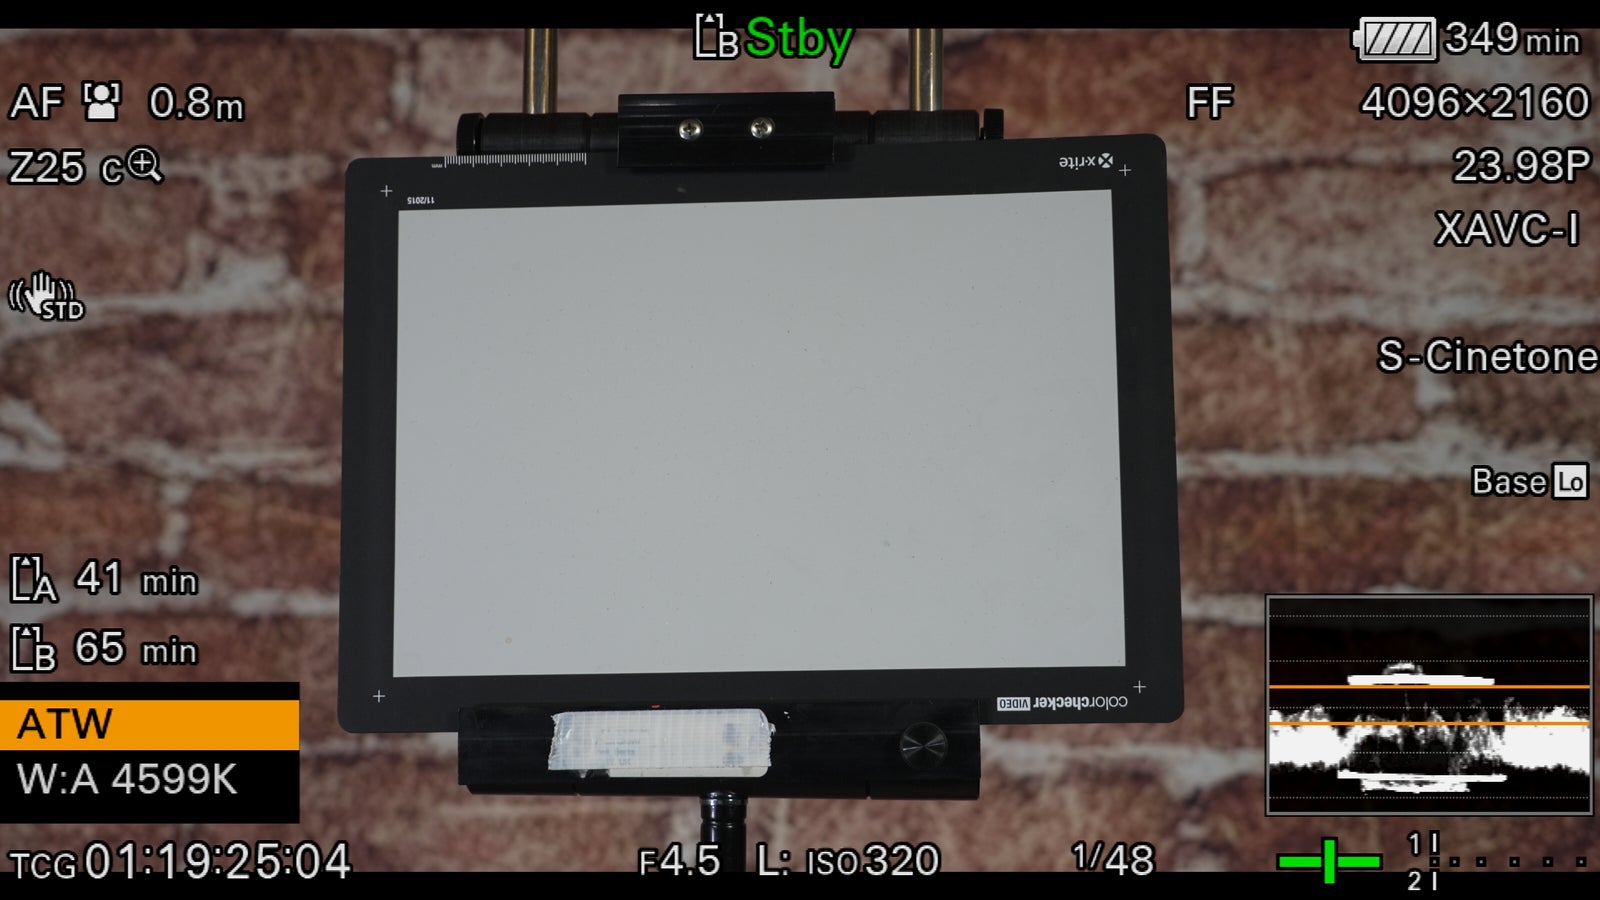
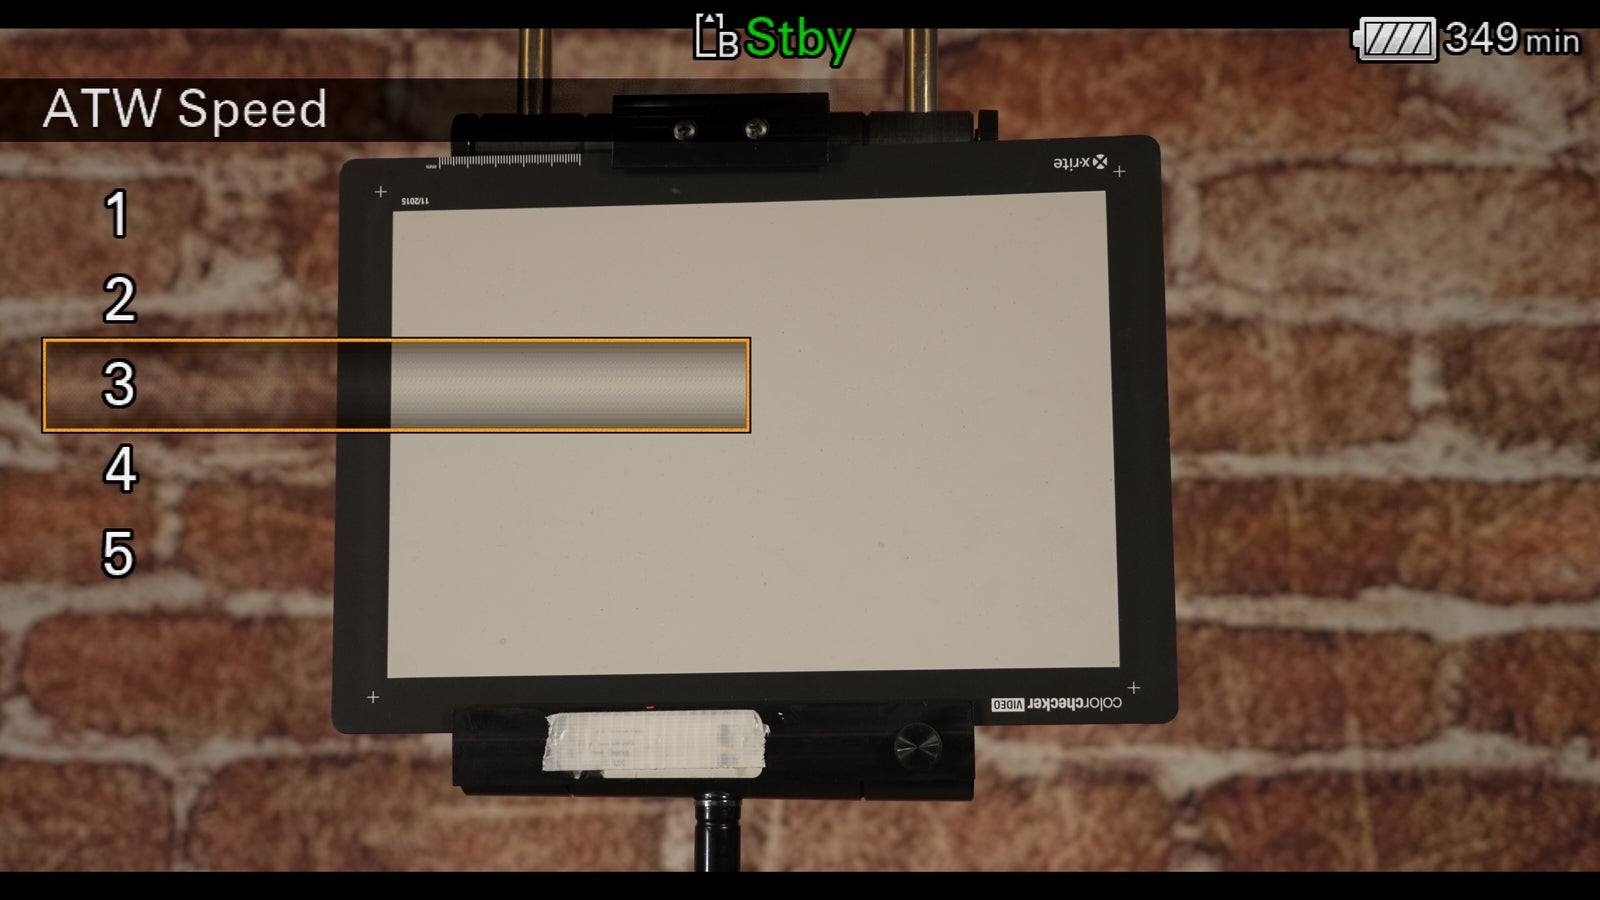
The speed at which the ATW adjusts can be changed in the menu under “White Setting – ATW Speed”. When set to 1 it responds to changes to the color temperature in the scene quickly. 5 is the slowest setting and the ATW adjustment rate is much slower. I recommend using a slower value (3 to 5) to avoid sudden dramatic changes to the color temperature of you shots while you are shooting.
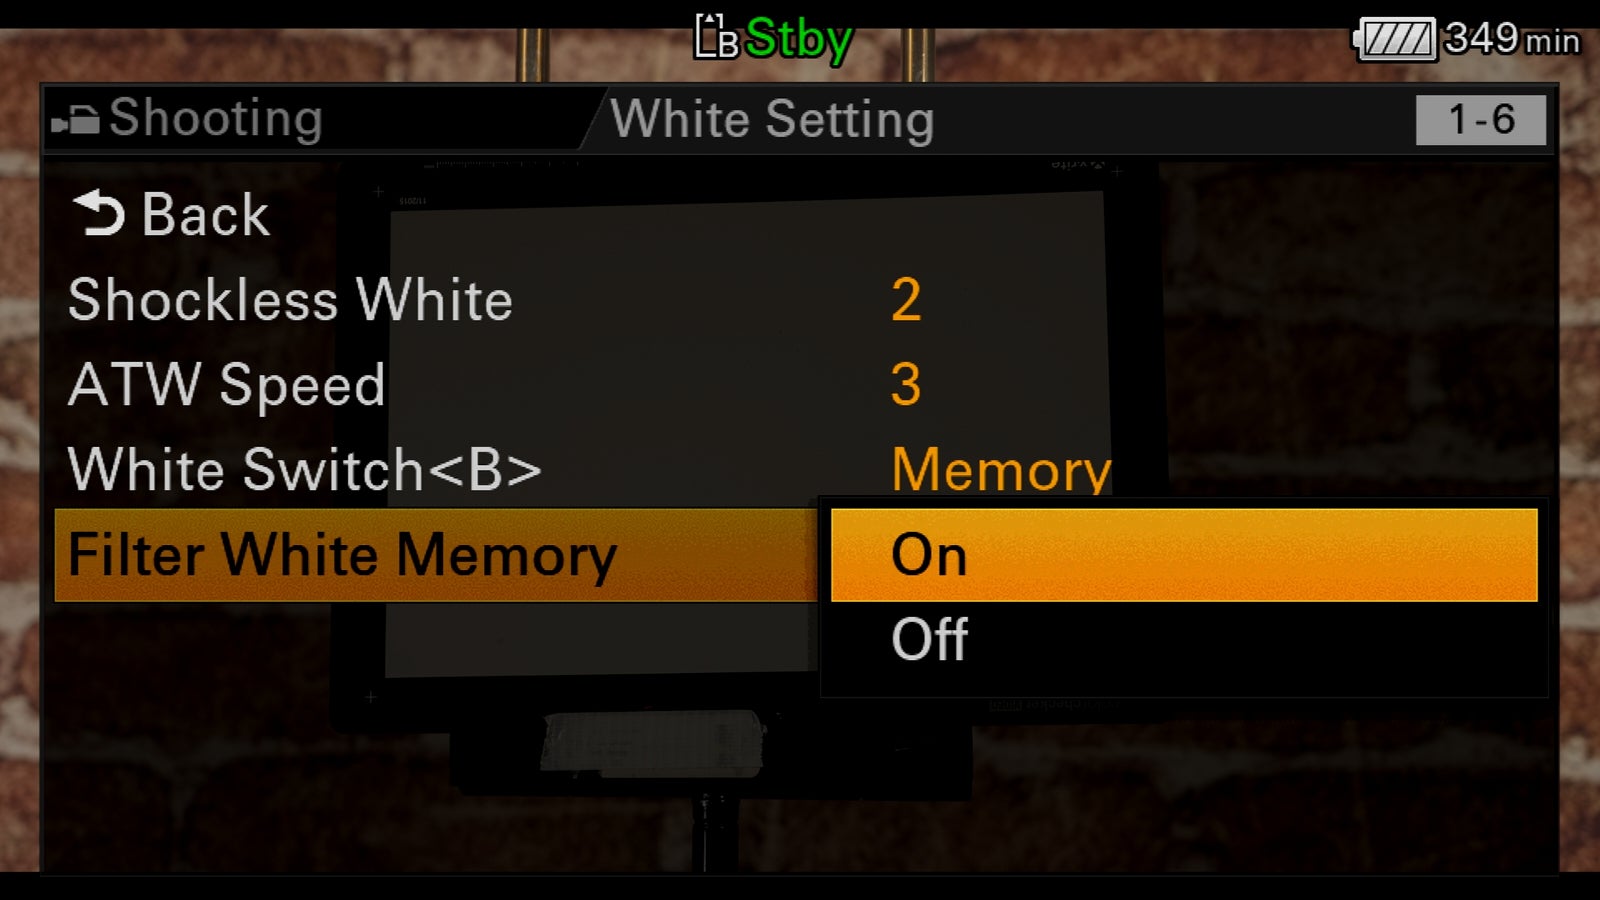
In addition you can set the white balance switch to enable ATW whenever it is set to position B. This is done in the menu under “Shooting - White Setting – White Switch B”. In the same part of the menu you will find a further control that allows you to change how quickly the ATW will respond to changes in color temperature.
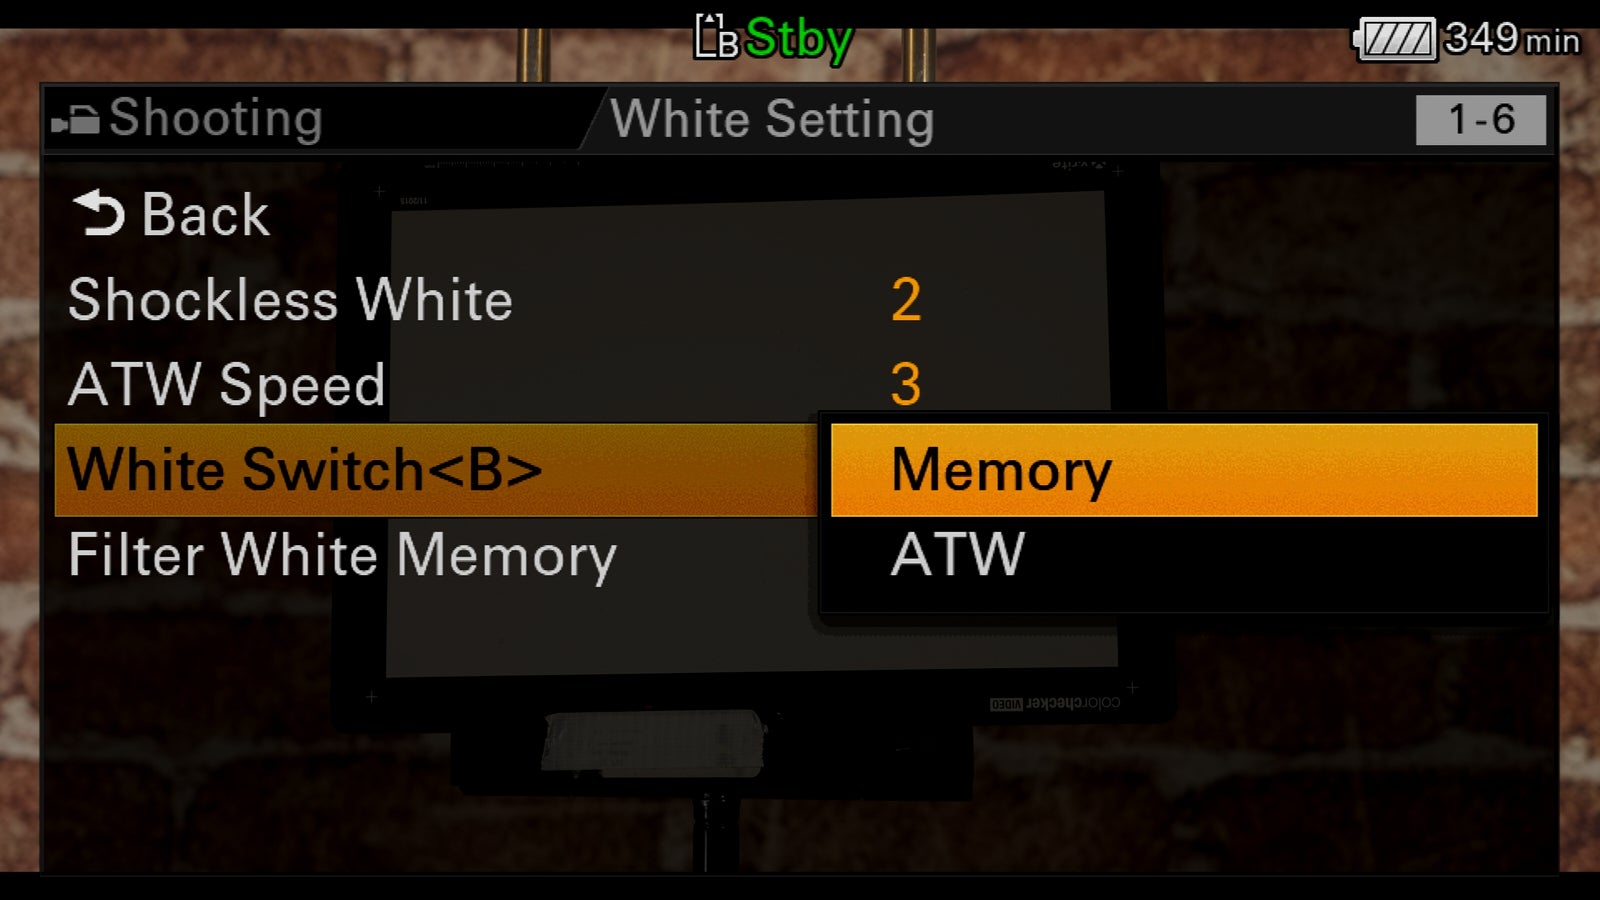
Image above: You can assign ATW to white balance switch position B in the menu
ATW is certainly a very useful function, but do be aware that it can be confused by large colored objects such as colored walls in a scene. If there are no white objects in the shot the camera may struggle to determine the correct color temperature. I only recommend using ATW where you have no other choice as it is easier to correct a consistently wrong white balance in post-production than a white balance that is constantly changing and varying.
Offset White
When shooing in SDR or HDR mode it is possible to apply an offset to the camera's A and B WB SET white balance function as well as ATW. You can use this offset to warm up or cool down your images to suit the mood you wish to portray in your footage. An offset for each of the A and B positions of the white balance switch in the menu under “Shooting – Offset White.”
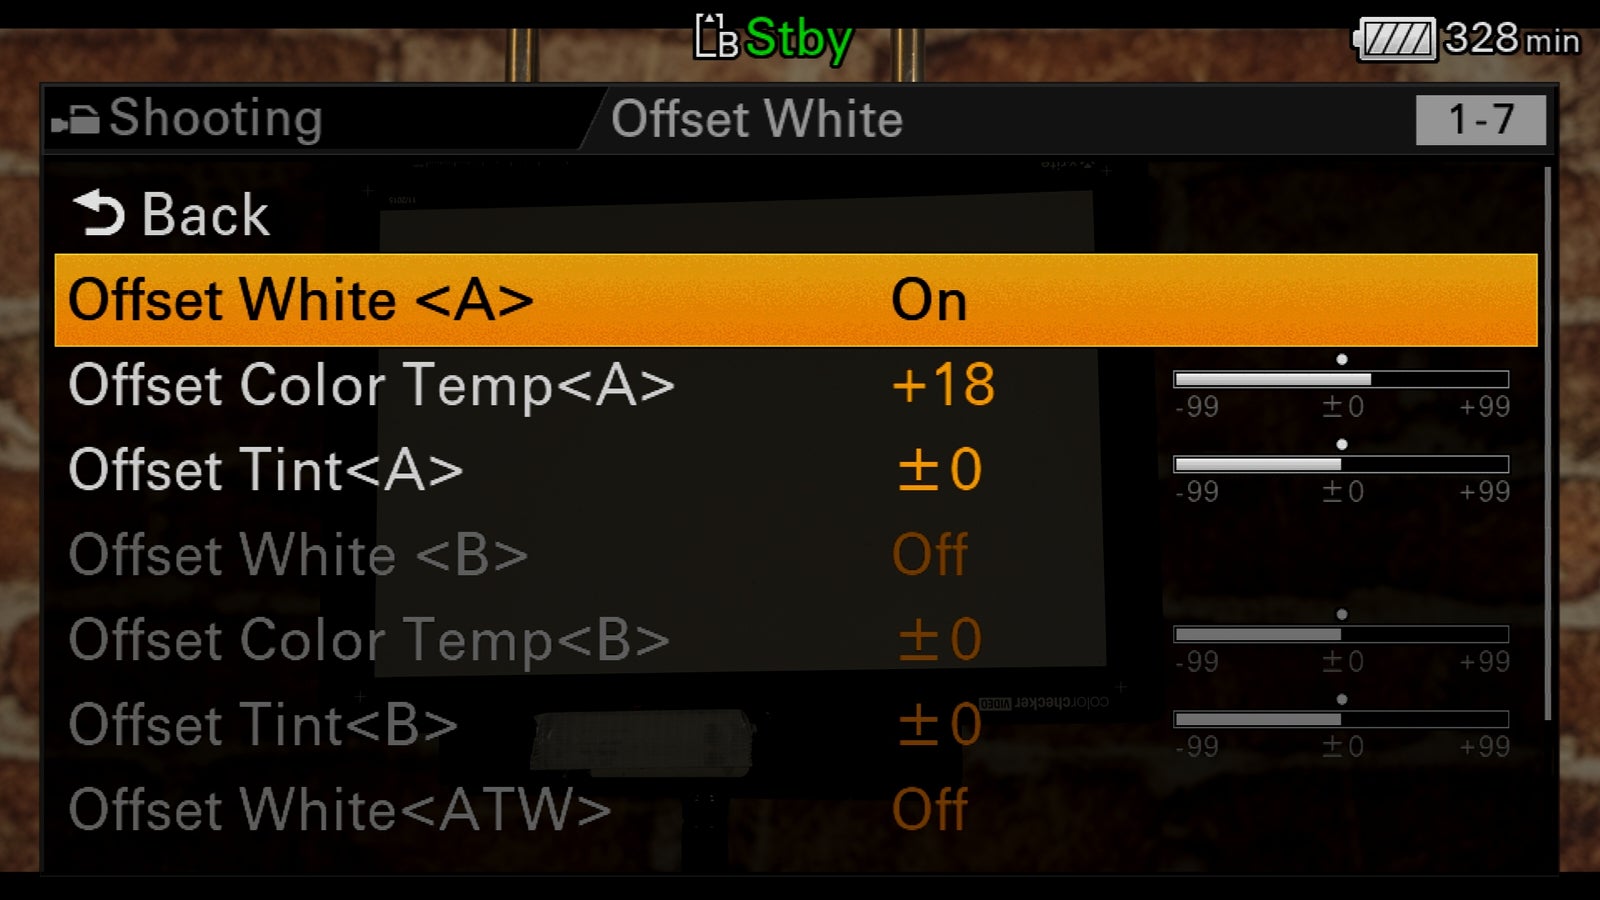
These offsets can then be turned ON and OFF as required. When set to ON, each time you set the white balance using WB SET, the offset will be added to the determined Color Temperature. A suggestion is to set a warm offset by setting a positive “Offset Color Temp” value for switch position A and a cool offset via a negative “Offset Color Temp” for position B. This way if you set the white balance of both the A and B switch positions using WB Set at the same time you can shoot with no offset by turning the offsets OFF or with a warm offset using position A and offset ON or cool offset using position B with offset ON.
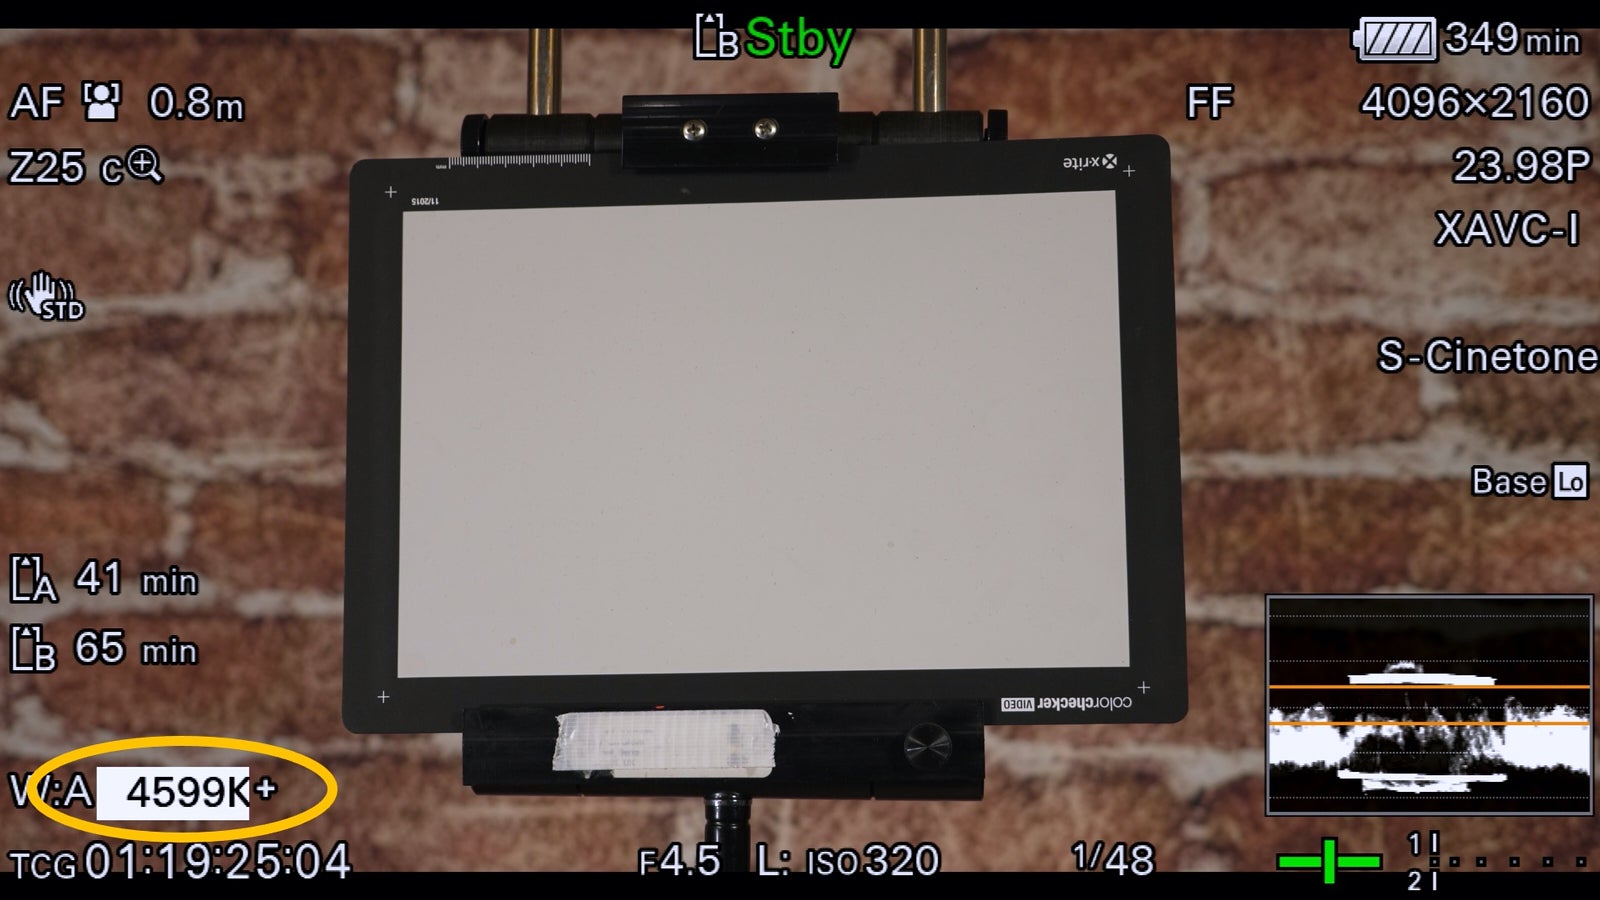
Image above: When a white balance offset is being added to the white balance a “+” symbol will appear next to the detected color temperature
Other White Balance Settings
If you look in the menu under “Shooting – White Setting” you will find some other white balance functions.
Shockless White controls the speed at which the white balance changes when you switch the white balance switch between the A and B memory positions. When set to OFF any change in switch position will result in an instant change to the white balance. When set to 1 to 3 the change between the color temperatures is more gradual with 1 being the fastest and 3 being the slowest rate of change.
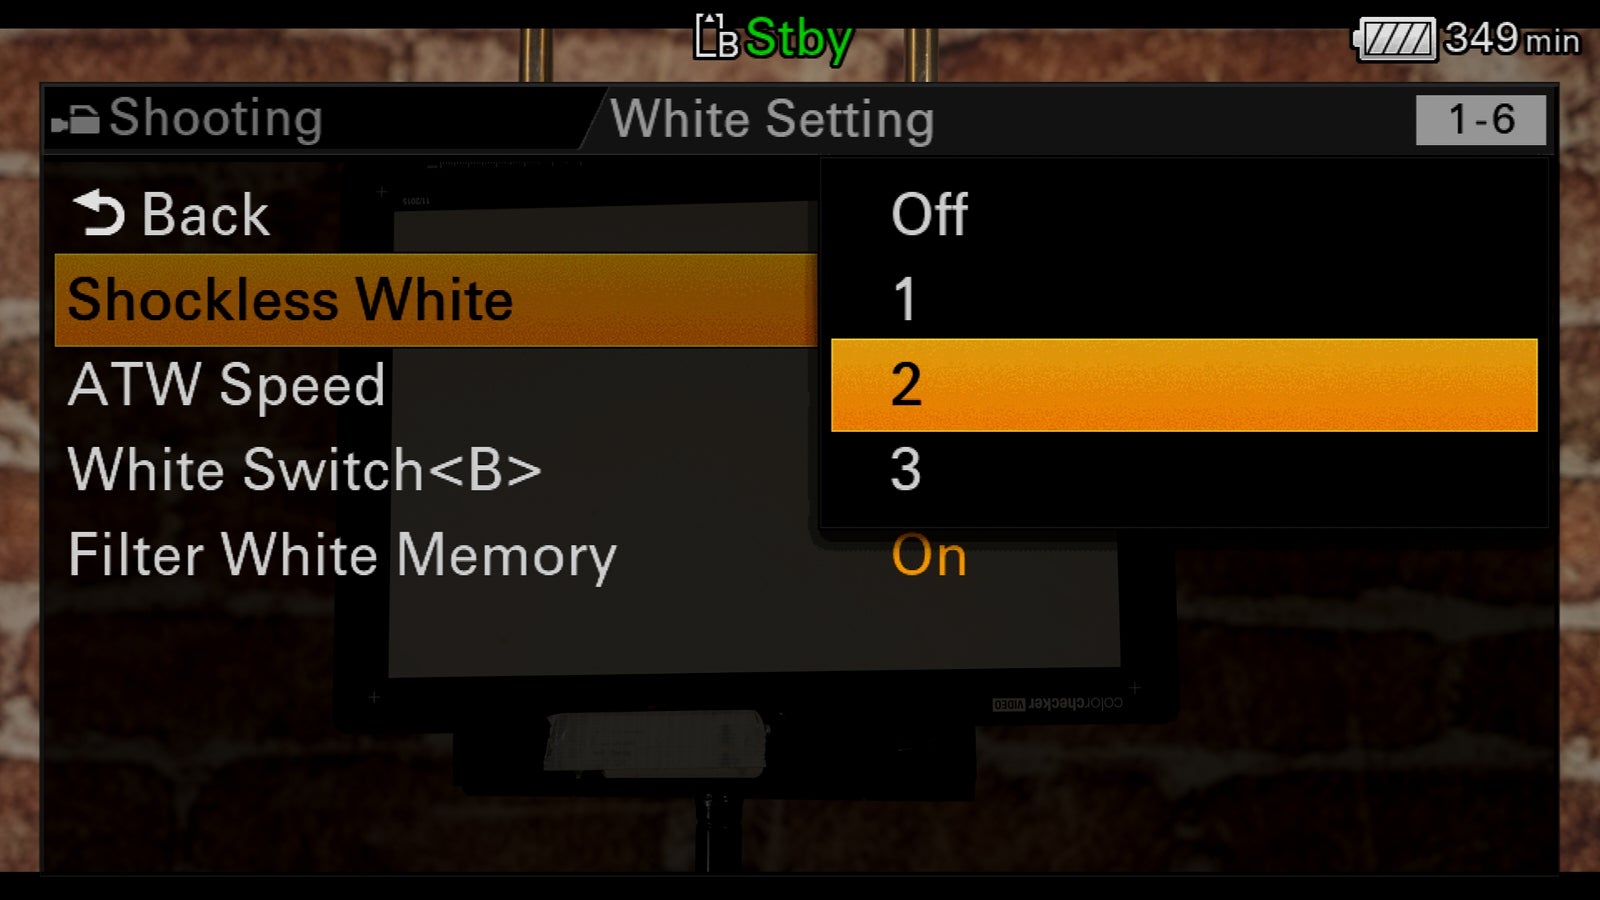
Filter White. When set to ON this allows a different Color Temp and Tint value to be saved for the ND Clear position as well as each of the ND filter Preset values. If using the variable ND control a Color Temp and Tint value is saved for ND clear and a different Color Temp and Tint value can be set for when the ND filter is engaged.
